
Django is a Python-based web framework that allows you to quickly create web applications. It has built-in admin interface which makes easy to work with it. It is often called Batteries included framework because it provides built-in facilities for every functionality. Class Based Generic Views are advanced set of Built-in views which are used for implementation of selective view strategies such as Create, Retrieve, Update, Delete. Class based views simplify the use by separating GET, POST requests for a view. They do not replace function-based views, but have certain differences and advantages when compared to function-based views:
- Organization of code related to specific HTTP methods (GET, POST, etc.) can be addressed by separate methods instead of conditional branching.
- Object oriented techniques such as mixins (multiple inheritance) can be used to factor code into reusable components.
This article revolves around complete implementation of Class Based Views in Django (Create, Retrieve, Update, Delete). Let’s discuss what actually CRUD means,
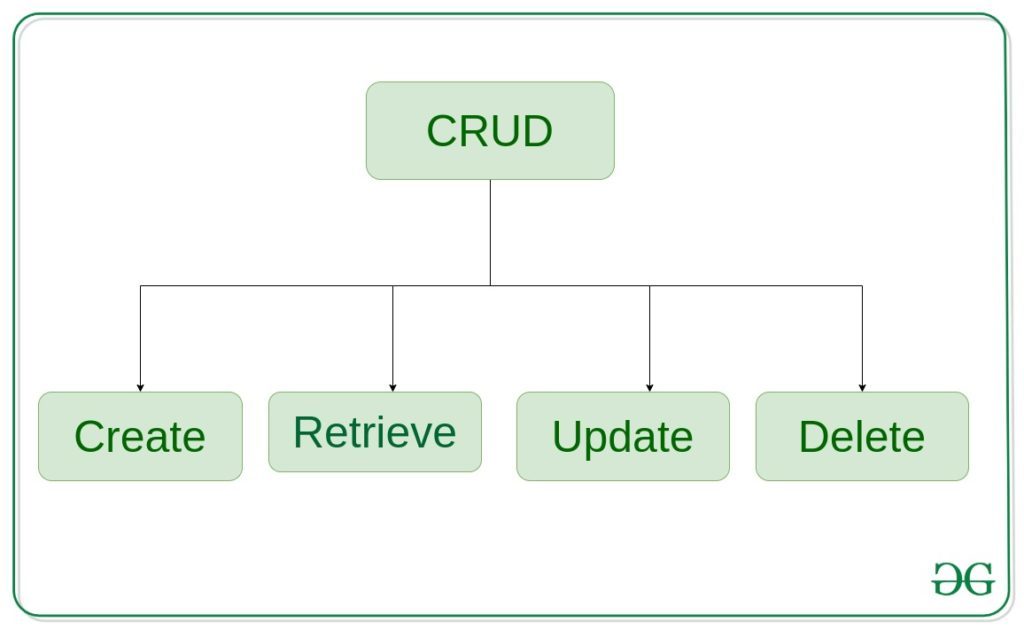
CreateView – create or add new entries in a table in the database.
Retrieve Views – read, retrieve, search, or view existing entries as a list(ListView) or retrieve a particular entry in detail (DetailView)
UpdateView – update or edit existing entries in a table in the database
DeleteView – delete, deactivate, or remove existing entries in a table in the database
FormView – render a form to template and handle data entered by user
Django CRUD (Create, Retrieve, Update, Delete) Class Based Views
Illustration of How to create and use CRUD views using an Example. Consider a project named geeksforgeeks having an app named geeks.
Refer to the following articles to check how to create a project and an app in Django.
After you have a project and an app, let’s create a model of which we will be creating instances through our view. In geeks/models.py,
# import the standard Django Model# from built-in libraryfrom django.db import models# declare a new model with a name "GeeksModel"class GeeksModel(models.Model):# fields of the modeltitle = models.CharField(max_length = 200)description = models.TextField()# renames the instances of the model# with their title namedef __str__(self):return self.title |
After creating this model, we need to run two commands in order to create Database for the same.
Python manage.py makemigrations
Python manage.py migrate
Now we will create a Django ModelForm for this model. Refer this article for more on modelform – Django ModelForm – Create form from Models. create a file forms.py in geeks folder,
from django import formsfrom .models import GeeksModel# creating a formclass GeeksForm(forms.ModelForm):# create meta classclass Meta:# specify model to be usedmodel = GeeksModel# specify fields to be usedfields = ["title","description",] |
Using Class Based Views
At its core, a class-based view allows you to respond to different HTTP request methods with different class instance methods, instead of with conditionally branching code inside a single view function.
So where the code to handle HTTP GET in a view function would look something like:
from django.http import HttpResponsedef my_view(request):if request.method == 'GET':# <view logic>return HttpResponse('result') |
In a class-based view, this would become:
from django.http import HttpResponsefrom django.views import Viewclass MyView(View):def get(self, request):# <view logic>return HttpResponse('result') |
Similarly in urls.py, one needs to use as_view() method to diffrentiate a class based view from function based view.
# urls.pyfrom django.urls import pathfrom myapp.views import MyViewurlpatterns = [path('about/', MyView.as_view()),] |
CreateView
Create View refers to a view (logic) to create an instance of a table in the database. We have already discussed basics of Create View in Create View – Function based Views Django. Class Based Views automatically setup everything from A to Z. One just needs to specify which model to create Create View for and the fields. Then Class based CreateView will automatically try to find a template in app_name/modelname_form.html. In our case it is geeks/templates/geeks/geeksmodel_form.html. Let’s create our class based view. In geeks/views.py,
from django.views.generic.edit import CreateViewfrom .models import GeeksModelclass GeeksCreate(CreateView):# specify the model for create viewmodel = GeeksModel# specify the fields to be displayedfields = ['title', 'description'] |
Now create a url path to map the view. In geeks/urls.py,
from django.urls import path# importing views from views..pyfrom .views import GeeksCreateurlpatterns = [path('', GeeksCreate.as_view() ),] |
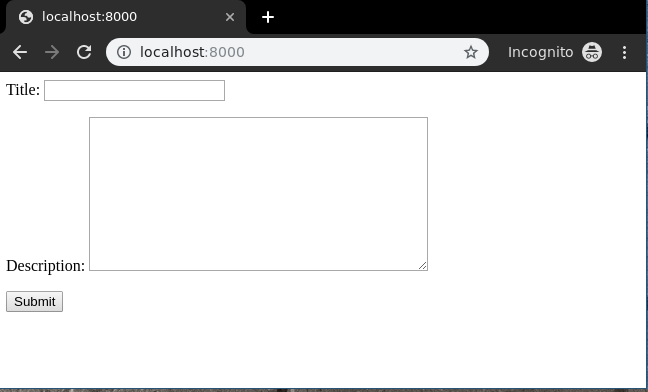
Create a template in templates/geeks/geeksmodel_form.html,
<form method="POST" enctype="multipart/form-data"><!-- Security token -->{% csrf_token %}<!-- Using the formset -->{{ form.as_p }}<input type="submit" value="Submit"></form> |
Let’s check what is there on http://localhost:8000/
To check complete implementation of Class based CreateView, visit Createview – Class Based Views Django.
####################################
# Class based view
def my_view(request): # function based
if request.method == 'GET':
# <view logic>
return HttpResponse('result')
################################################
CREATE
################################################
# For the above code equivalent class based code
from django.views import View
class MyView(View): # Class based
def get(self, request):
# <view logic>
return HttpResponse('result')
from django.views.generic.edit import CreateView
from .models import RTI
class RtiCreate(CreateView): # Create view
# specify the model for create view
model =RTI
# specify the fields to be displayed
fields = ['rti_no', 'rti_label','rti_lrg','rti_dif','rti_symptom']
success_url = "/rti/about"
ADd templates/analyzer/rti_form.html
<form method="POST" enctype="multipart/form-data">
<!-- Security token -->
{% csrf_token %}
<!-- Using the formset -->
{{ form.as_p }}
<input type="submit" value="Submit">
</form>
########################################
Retrieve Views
ListView
List View refers to a view (logic) to display multiple instances of a table in the database. We have already discussed basics of List View in List View – Function based Views Django. Class Based Views automatically setup everything from A to Z. One just needs to specify which model to create ListView for, then Class based ListView will automatically try to find a template in app_name/modelname_list.html. In our case it is geeks/templates/geeks/geeksmodel_list.html. Let’s create our class based view. In geeks/views.py,
from django.views.generic.list import ListViewfrom .models import GeeksModelclass GeeksList(ListView):# specify the model for list viewmodel = GeeksModel |
Now create a url path to map the view. In geeks/urls.py,
from django.urls import path# importing views from views..pyfrom .views import GeeksListurlpatterns = [path('', GeeksList.as_view()),] |
Create a template in templates/geeks/geeksmodel_list.html,
<ul><!-- Iterate over object_list -->{% for object in object_list %}<!-- Display Objects --><li>{{ object.title }}</li><li>{{ object.description }}</li><hr/><!-- If objet_list is empty -->{% empty %}<li>No objects yet.</li>{% endfor %}</ul> |
Let’s check what is there on http://localhost:8000/

To check complete implementation of Class based ListView, visit ListView – Class Based Views Django
##############################################
urls.py
path('list/', views.RtiList.as_view()),
views.py
from django.views.generic.list import ListView
from .models import RTI
class RtiList(ListView):
# specify the model for list view
model = RTI
templates/analyzer/form_list.html
<ul>
<!-- Iterate over object_list -->
{% for object in object_list %}
<!-- Display Objects -->
<li>{{ object.rti_no }}</li>
<li>{{ object.rti_dif }}</li>
<hr/>
<!-- If objet_list is empty -->
{% empty %}
<li>No objects yet.</li>
{% endfor %}
</ul>
<!DOCTYPE html>
<title>Pokedex</title>
<ul>{% for RTI in RTI_list %}
<li><a href="{% url "app:pokemon" RTI.name %}">{{ RTI.dif}}</a>
– {{ RTI.no }}
</ul>
The context is populated with the list of object under two name, object_list and a second one build from the model name, here pokemon_list. If you have paginated the list, you have to take care of next and previous link too. The Paginator object can help with that, it's available in the context data too.
######################################################
DetailView
Detail View refers to a view (logic) to display one instances of a table in the database. We have already discussed basics of Detail View in Detail View – Function based Views Django. Class Based Views automatically setup everything from A to Z. One just needs to specify which model to create DetailView for, then Class based DetailView will automatically try to find a template in app_name/modelname_detail.html. In our case it is geeks/templates/geeks/geeksmodel_detail.html. Let’s create our class based view. In geeks/views.py,
from django.views.generic.detail import DetailViewfrom .models import GeeksModelclass GeeksDetailView(DetailView):# specify the model to usemodel = GeeksModel |
Now create a url path to map the view. In geeks/urls.py,
from django.urls import path# importing views from views..pyfrom .views import GeeksDetailViewurlpatterns = [# <pk> is identification for id field,# slug can also be usedpath('<pk>/', GeeksDetailView.as_view()),] |
Create a template in templates/geeks/geeksmodel_detail.html,
<h1>{{ object.title }}</h1><p>{{ object.description }}</p> |
Let’s check what is there on http://localhost:8000/1/

To check complete implementation of Class based DetailView, visit DetailView – Class Based Views Django
views.py
from django.views.generic.detail import DetailView
from .models import RTI
class RtiDetailView(DetailView):
# specify the model to use
model = RTI
URL.py
path('<pk>/', views.RtiDetailView.as_view()),
templates/analyzer/rti_detail.html
<ul>
<li>{{ object.rti_no }}</li>
<li>{{ object.rti_dif }}</li>
</ul>
http://127.0.0.1:8000/rti/1/
UpdateView
UpdateView refers to a view (logic) to update a particular instance of a table from the database with some extra details. It is used to update enteries in the database for example, updating an article at geeksforgeeks. We have already discussed basics of Update View in Update View – Function based Views Django. Class Based Views automatically setup everything from A to Z. One just needs to specify which model to create UpdateView for, then Class based UpdateView will automatically try to find a template in app_name/modelname_form.html. In our case it is geeks/templates/geeks/geeksmodel_form.html. Let’s create our class based view. In geeks/views.py,
# import generic UpdateViewfrom django.views.generic.edit import UpdateView# Relative import of GeeksModelfrom .models import GeeksModelclass GeeksUpdateView(UpdateView):# specify the model you want to usemodel = GeeksModel# specify the fieldsfields = ["title","description"]# can specify success url# url to redirect after successfully# updating detailssuccess_url ="/" |
Now create a url path to map the view. In geeks/urls.py,
from django.urls import path# importing views from views..pyfrom .views import GeeksUpdateViewurlpatterns = [# <pk> is identification for id field,# <slug> can also be usedpath('<pk>/update', GeeksUpdateView.as_view()),] |
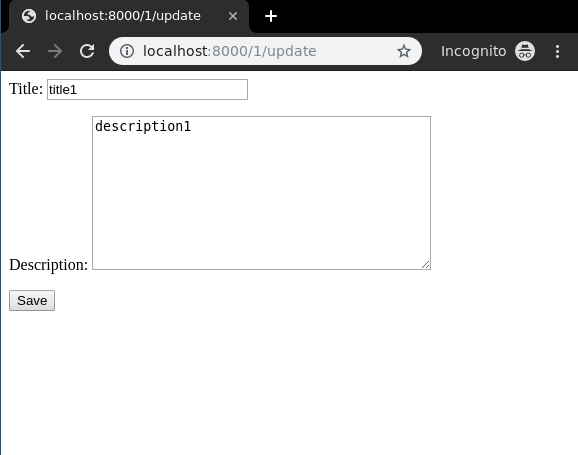
Create a template in templates/geeks/geeksmodel_form.html,
<form method="post">{% csrf_token %}{{ form.as_p }}<input type="submit" value="Save"></form> |
Let’s check what is there on http://localhost:8000/1/update/
To check complete implementation of Class based UpdateView, visit UpdateView – Class Based Views Django.
url.py
path('<pk>/update',views.RtiUpdateView.as_view()),
Views.py
from django.views.generic.edit import UpdateView
from .models import RTI
class RtiUpdateView(UpdateView):
# specify the model for create view
model =RTI
# specify the fields to be displayed
fields = ['rti_no', 'rti_label','rti_lrg','rti_dif','rti_symptom']
success_url = "/rti/about"
rti_form.py
<form method="POST" enctype="multipart/form-data">
<!-- Security token -->
{% csrf_token %}
<!-- Using the formset -->
{{ form.as_p }}
<input type="submit" value="Submit">
</form>
http://127.0.0.1:8000/rti/1/update
DeleteView
Delete View refers to a view (logic) to delete a particular instance of a table from the database. It is used to delete enteries in the database for example, deleting an article at geeksforgeeks. We have already discussed basics of Delete View in Delete View – Function based Views Django. Class Based Views automatically setup everything from A to Z. One just needs to specify which model to create DeleteView for, then Class based DeleteViewde will automatically try to find a template in app_name/modelname_confirm_delete.html. In our case it is geeks/templates/geeks/geeksmodel_confirm_delete.html. Let’s create our class based view. In geeks/views.py,
# import generic UpdateViewfrom django.views.generic.edit import DeleteView# Relative import of GeeksModelfrom .models import GeeksModelclass GeeksDeleteView(DeleteView):# specify the model you want to usemodel = GeeksModel# can specify success url# url to redirect after successfully# deleting objectsuccess_url ="/" |
Now create a url path to map the view. In geeks/urls.py,
from django.urls import path# importing views from views..pyfrom .views import GeeksDeleteViewurlpatterns = [# <pk> is identification for id field,# slug can also be usedpath('<pk>/delete/', GeeksDeleteView.as_view()),] |
Create a template in templates/geeks/geeksmodel_confirm_delete.html,
<form method="post">{% csrf_token %}<p>Are you sure you want to delete "{{ object }}"?</p><input type="submit" value="Confirm"></form> |
Let’s check what is there on http://localhost:8000/1/delete
 .
.
To check complete implementation of Class based DeleteView, visit DeleteView – Class Based Views Django
FormView
FormView refers to a view (logic) to display and verify a Django Form. For example a form to register users at geeksforgeeks. Class Based Views automatically setup everything from A to Z. One just needs to specify which form to create FormView for and template_name, then Class based FormView will automatically render that form. Let’s create our class based view. In geeks/views.py,
# import generic FormViewfrom django.views.generic.edit import FormView# Relative import of GeeksFormfrom .forms import GeeksFormclass GeeksFormView(FormView):# specify the Form you want to useform_class = GeeksForm# sepcify name of templatetemplate_name = "geeks / geeksmodel_form.html"# can specify success url# url to redirect after successfully# updating detailssuccess_url ="/thanks/" |
Create a template for this view in geeks/geeksmodel_form.html,
<form method="post">{% csrf_token %}{{ form.as_p }}<input type="submit" value="Save"></form> |
Map a url to this view in geeks/urls.py,
from django.urls import path# importing views from views..pyfrom .views import GeeksFormViewurlpatterns = [path('', GeeksFormView.as_view()),] |
Now visit http://127.0.0.1:8000/,
To check complete implementation of Class based FormView, visit FormView – Class Based Views Django