
Creating forms in Django, is really similar to creating a model. Here again, we just need to inherit from Django class and the class attributes will be the form fields. Let's add a forms.py file in myapp folder to contain our app forms. We will create a login form.
myapp/forms.py
#-*- coding: utf-8 -*-
from django import forms

class LoginForm(forms.Form):
   user = forms.CharField(max_length = 100)
   password = forms.CharField(widget = forms.PasswordInput())
As seen above, the field type can take "widget" argument for html rendering; in our case, we want the password to be hidden, not displayed. Many others widget are present in Django: DateInput for dates, CheckboxInput for checkboxes, etc.
Form fields
- class
Field(**kwargs)
When you create a Form class, the most important part is defining the fields of the form. Each field has custom validation logic, along with a few other hooks.
Field.clean(value)
Although the primary way you’ll use Field classes is in Form classes, you can also instantiate them and use them directly to get a better idea of how they work. Each Field instance has a clean() method, which takes a single argument and either raises a django.core.exceptions.ValidationError exception or returns the clean value:
>>> from django import forms
>>> f = forms.EmailField()
>>> f.clean('foo@example.com')
'foo@example.com'
>>> f.clean('invalid email address')
Traceback (most recent call last):
...
ValidationError: ['Enter a valid email address.']
Core field arguments
Each Field class constructor takes at least these arguments. Some Field classes take additional, field-specific arguments, but the following should always be accepted:
required
Field.required
By default, each Field class assumes the value is required, so if you pass an empty value – either None or the empty string ("") – then clean() will raise a ValidationError exception:
>>> from django import forms
>>> f = forms.CharField()
>>> f.clean('foo')
'foo'
>>> f.clean('')
Traceback (most recent call last):
...
ValidationError: ['This field is required.']
>>> f.clean(None)
Traceback (most recent call last):
...
ValidationError: ['This field is required.']
>>> f.clean(' ')
' '
>>> f.clean(0)
'0'
>>> f.clean(True)
'True'
>>> f.clean(False)
'False'
To specify that a field is not required, pass required=False to the Field constructor:
>>> f = forms.CharField(required=False)
>>> f.clean('foo')
'foo'
>>> f.clean('')
''
>>> f.clean(None)
''
>>> f.clean(0)
'0'
>>> f.clean(True)
'True'
>>> f.clean(False)
'False'
if a Field has required=False and you pass clean() an empty value, then clean() will return a normalized empty value rather than raising ValidationError. For CharField, this will return empty_value which defaults to an empty string. For other Field classes, it might be None. (This varies from field to field.)
Widgets of required form fields have the required HTML attribute. Set the Form.use_required_attribute attribute to False to disable it. The required attribute isn’t included on forms of formsets because the browser validation may not be correct when adding and deleting formsets.
label
Field.label
The label argument lets you specify the “human-friendly” label for this field. This is used when the Field is displayed in a Form.
As explained in “Outputting forms as HTML” above, the default label for a Field is generated from the field name by converting all underscores to spaces and upper-casing the first letter. Specify label if that default behavior doesn’t result in an adequate label.
Here’s a full example Form that implements label for two of its fields. We’ve specified auto_id=False to simplify the output:
>>> from django import forms
>>> class CommentForm(forms.Form):
...     name = forms.CharField(label='Your name')
...     url = forms.URLField(label='Your website', required=False)
...     comment = forms.CharField()
>>> f = CommentForm(auto_id=False)
>>> print(f)
<tr><th>Your name:</th><td><input type="text" name="name" required></td></tr>
<tr><th>Your website:</th><td><input type="url" name="url"></td></tr>
<tr><th>Comment:</th><
initial
Field.initial
The initial argument lets you specify the initial value to use when rendering this Field in an unbound Form.
To specify dynamic initial data, see the Form.initial parameter.
The use-case for this is when you want to display an “empty” form in which a field is initialized to a particular value. For example:
>>> from django import forms
>>> class CommentForm(forms.Form):
...     name = forms.CharField(initial='Your name')
...     url = forms.URLField(initial='http://')
...     comment = forms.CharField()
>>> f = CommentForm(auto_id=False)
>>> print(f)
<tr><th>Name:</th><td><input type="text" name="name" value="Your name" required></td></tr>
<tr><th>Url:</th><td><input type="url" name="url" value="http://" required></td></tr>
<tr><th>Comment:</th><td><input type="text" name="comment" required></td></tr>
You may be thinking, why not just pass a dictionary of the initial values as data when displaying the form? Well, if you do that, you’ll trigger validation, and the HTML output will include any validation errors:
>>> class CommentForm(forms.Form):
widget
Field.widget
The widget argument lets you specify a Widget class to use when rendering this Field. See Widgets for more information
Built-in Field classes
Naturally, the forms library comes with a set of Field classes that represent common validation needs. This section documents each built-in field.
For each field, we describe the default widget used if you don’t specify widget. We also specify the value returned when you provide an empty value (see the section on required above to understand what that means).
BooleanField
- class
BooleanField(**kwargs) -
- Default widget:
CheckboxInput - Empty value:
False - Normalizes to: A Python
TrueorFalsevalue. - Validates that the value is
True(e.g. the check box is checked) if the field hasrequired=True. - Error message keys:
required
- Default widget:
CharField
- class
CharField(**kwargs) -
- Default widget:
TextInput - Empty value: Whatever you’ve given as
empty_value. - Normalizes to: A string.
- Uses
MaxLengthValidatorandMinLengthValidatorifmax_lengthandmin_lengthare provided. Otherwise, all inputs are valid. - Error message keys:
required,max_length,min_length
Has four optional arguments for validation:
max_length
min_length- If provided, these arguments ensure that the string is at most or at least the given length.
strip- If
True(default), the value will be stripped of leading and trailing whitespace.
empty_value- The value to use to represent “empty”. Defaults to an empty string.
- Default widget:
ChoiceField
- class
ChoiceField(**kwargs) -
- Default widget:
Select - Empty value:
''(an empty string) - Normalizes to: A string.
- Validates that the given value exists in the list of choices.
- Error message keys:
required,invalid_choice
The
invalid_choiceerror message may contain%(value)s, which will be replaced with the selected choice.Takes one extra argument:
choices- Either an iterable of 2-tuples to use as choices for this field, enumeration choices, or a callable that returns such an iterable. This argument accepts the same formats as the
choicesargument to a model field. See the model field reference documentation on choices for more details. If the argument is a callable, it is evaluated each time the field’s form is initialized, in addition to during rendering. Defaults to an empty list.
- Default widget:
TypedChoiceField
- class
TypedChoiceField(**kwargs) - Just like a
ChoiceField, exceptTypedChoiceFieldtakes two extra arguments,coerceandempty_value.- Default widget:
Select - Empty value: Whatever you’ve given as
empty_value. - Normalizes to: A value of the type provided by the
coerceargument. - Validates that the given value exists in the list of choices and can be coerced.
- Error message keys:
required,invalid_choice
Takes extra arguments:
coerce- A function that takes one argument and returns a coerced value. Examples include the built-in
int,float,booland other types. Defaults to an identity function. Note that coercion happens after input validation, so it is possible to coerce to a value not present inchoices.
empty_value- The value to use to represent “empty.” Defaults to the empty string;
Noneis another common choice here. Note that this value will not be coerced by the function given in thecoerceargument, so choose it accordingly.
- Default widget:
URLField
- class
URLField(**kwargs) -
- Default widget:
URLInput - Empty value: Whatever you’ve given as
empty_value. - Normalizes to: A string.
- Uses
URLValidatorto validate that the given value is a valid URL. - Error message keys:
required,invalid
Has three optional arguments
max_length,min_length, andempty_valuewhich work just as they do forCharField. - Default widget:
EmailField
- class
EmailField(**kwargs) -
- Default widget:
EmailInput - Empty value: Whatever you’ve given as
empty_value. - Normalizes to: A string.
- Uses
EmailValidatorto validate that the given value is a valid email address, using a moderately complex regular expression. - Error message keys:
required,invalid
Has three optional arguments
max_length,min_length, andempty_valuewhich work just as they do forCharField. - Default widget:
FileField
- class
FileField(**kwargs)¶ -
- Default widget:
ClearableFileInput - Empty value:
None - Normalizes to: An
UploadedFileobject that wraps the file content and file name into a single object. - Can validate that non-empty file data has been bound to the form.
- Error message keys:
required,invalid,missing,empty,max_length
Has two optional arguments for validation,
max_lengthandallow_empty_file. If provided, these ensure that the file name is at most the given length, and that validation will succeed even if the file content is empty.To learn more about the
UploadedFileobject, see the file uploads documentation.When you use a
FileFieldin a form, you must also remember to bind the file data to the form.The
max_lengtherror refers to the length of the filename. In the error message for that key,%(max)dwill be replaced with the maximum filename length and%(length)dwill be replaced with the current filename length. - Default widget:
FilePathField
- class
FilePathField(**kwargs)¶ -
- Default widget:
Select - Empty value:
''(an empty string) - Normalizes to: A string.
- Validates that the selected choice exists in the list of choices.
- Error message keys:
required,invalid_choice
The field allows choosing from files inside a certain directory. It takes five extra arguments; only
pathis required:path¶- The absolute path to the directory whose contents you want listed. This directory must exist.
recursive¶- If
False(the default) only the direct contents ofpathwill be offered as choices. IfTrue, the directory will be descended into recursively and all descendants will be listed as choices.
match¶- A regular expression pattern; only files with names matching this expression will be allowed as choices.
allow_files¶- Optional. Either
TrueorFalse. Default isTrue. Specifies whether files in the specified location should be included. Either this orallow_foldersmust beTrue.
allow_folders¶- Optional. Either
TrueorFalse. Default isFalse. Specifies whether folders in the specified location should be included. Either this orallow_filesmust beTrue.
- Default widget:
IntegerField
- class
IntegerField(**kwargs)¶ -
- Default widget:
NumberInputwhenField.localizeisFalse, elseTextInput. - Empty value:
None - Normalizes to: A Python integer.
- Validates that the given value is an integer. Uses
MaxValueValidatorandMinValueValidatorifmax_valueandmin_valueare provided. Leading and trailing whitespace is allowed, as in Python’sint()function. - Error message keys:
required,invalid,max_value,min_value
The
max_valueandmin_valueerror messages may contain%(limit_value)s, which will be substituted by the appropriate limit.Takes two optional arguments for validation:
max_value
min_value¶- These control the range of values permitted in the field.
- Default widget:
Using Form in a View
There are two kinds of HTTP requests, GET and POST. In Django, the request object passed as parameter to your view has an attribute called "method" where the type of the request is set, and all data passed via POST can be accessed via the request.POST dictionary.
Let's create a login view in our myapp/views.py −
#-*- coding: utf-8 -*-
from myapp.forms import LoginForm

def login(request):
   username = "not logged in"

   if request.method == "POST":
      #Get the posted form
      MyLoginForm = LoginForm(request.POST)

      if MyLoginForm.is_valid():
         username = MyLoginForm.cleaned_data['username']
   else:
      MyLoginForm = Loginform()

   return render(request, 'loggedin.html', {"username" : username})
The view will display the result of the login form posted through the loggedin.html. To test it, we will first need the login form template. Let's call it login.html.
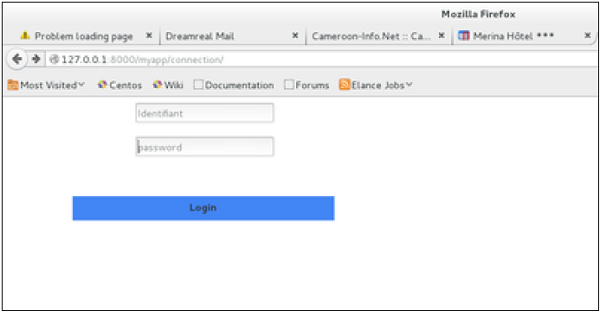
<html>
   <body>

      <form name = "form" action = "{% url "myapp.views.login" %}"
         method = "POST" >{% csrf_token %}

         <div style = "max-width:470px;">
            <center>
               <input type = "text" style = "margin-left:20%;"
                  placeholder = "Identifiant" name = "username" />
            </center>
         </div>

         <br>

         <div style = "max-width:470px;">
            <center>
               <input type = "password" style = "margin-left:20%;"
                  placeholder = "password" name = "password" />
            </center>
         </div>

         <br>

         <div style = "max-width:470px;">
            <center>

               <button style = "border:0px; background-color:#4285F4; margin-top:8%;
                  height:35px; width:80%;margin-left:19%;" type = "submit"
                  value = "Login" >
                  <strong>Login</strong>
               </button>

            </center>
         </div>

      </form>

   </body>
</html>
The template will display a login form and post the result to our login view above. You have probably noticed the tag in the template, which is just to prevent Cross-site Request Forgery (CSRF) attack on your site.
{% csrf_token %}
Once we have the login template, we need the loggedin.html template that will be rendered after form treatment.
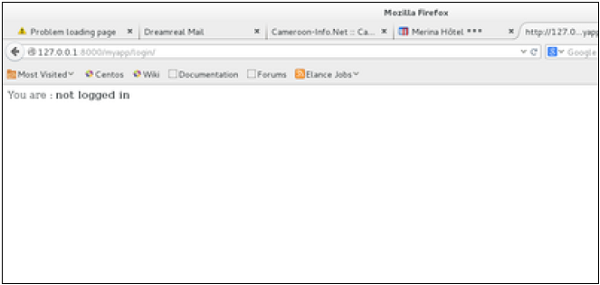
<html>

   <body>
      You are : <strong>{{username}}</strong>
   </body>

</html>
Now, we just need our pair of URLs to get started: myapp/urls.py
from django.conf.urls import patterns, url
from django.views.generic import TemplateView

urlpatterns = patterns('myapp.views',
   url(r'^connection/',TemplateView.as_view(template_name = 'login.html')),
   url(r'^login/', 'login', name = 'login'))
When accessing "/myapp/connection", we will get the following login.html template rendered −
On the form post, the form is valid. In our case make sure to fill the two fields and you will get −

In case your username is polo, and you forgot the password. You will get the following message −
Using Our Own Form Validation
In the above example, when validating the form −
MyLoginForm.is_valid()
We only used Django self-form validation engine, in our case just making sure the fields are required. Now let’s try to make sure the user trying to login is present in our DB as Dreamreal entry. For this, change the myapp/forms.py to −
#-*- coding: utf-8 -*-
from django import forms
from myapp.models import Dreamreal

class LoginForm(forms.Form):
   user = forms.CharField(max_length = 100)
   password = forms.CharField(widget = forms.PasswordInput())

   def clean_message(self):
      username = self.cleaned_data.get("username")
      dbuser = Dreamreal.objects.filter(name = username)

      if not dbuser:
         raise forms.ValidationError("User does not exist in our db!")
      return username
Now, after calling the "is_valid" method, we will get the correct output, only if the user is in our database. If you want to check a field of your form, just add a method starting by "clean_" then your field name to your form class. Raising a forms.ValidationError is important.
###################################################
myapp/urls.py
from django.contrib import admin
from django.urls import path,re_path
from . import views
from django.views.generic import TemplateView
urlpatterns = [
#'myapp.views',
#path('admin/', admin.site.urls),
path('', views.hello,name='hello1'),
re_path('display(\d+)', views.hello2,name='id'),
path('crud', views.crudops,name='crud'),
re_path('temp(\d+)', views.hello3,name='id'),
path(r'connection/',TemplateView.as_view(template_name = 'login.html')),
path(r'^login/', views.login, name = 'login'),
]
#################myapp/views.py#####
def login(request):
username = "not logged in"
# request.method: type of HTML action , GET or PUT or POST etc
if request.method == "POST":
#Get the posted form
# request.POST : gets the data from html page
print("Get data from HTML")
MyLoginForm = LoginForm(request.POST)
username = MyLoginForm.data.get('username')
#Debugging
#print( MyLoginForm.errors)
print("Login user:",username, " ",MyLoginForm.is_valid())
# MyLoginForm.clean_message()
if MyLoginForm.is_valid():
username = MyLoginForm.cleaned_data['username']
print("Login user:",username)
else:
print("Validation failed")
username="Invalid user name or not registered"
else:
print(" no POST")
MyLoginForm = Loginform()
return render(request, 'loggedin.html', {"username" : username})
myapp/forms.py
from django import forms
from myapp.models import Dreamreal
class LoginForm(forms.Form):
username = forms.CharField(max_length = 100)
password = forms.CharField(widget = forms.PasswordInput())
def clean_username(self): # clean_<field name>
username = self.cleaned_data.get("username")
print("user ravi:",username)
dbuser = Dreamreal.objects.filter(name = username)
if(dbuser):
print("Valid user name")
else:
print("not valid anme")
if dbuser:
print("Valid user")
else:
raise ValidationError("User does not exist in our db!")
return username
myapp/templates/login.html
<html>
<body>
<form name = "form" action = {% url "login" %}
method = "POST" >{% csrf_token %}
<div style = "max-width:470px;">
<center>
<input type = "text" style = "margin-left:20%;"
placeholder = "Identifiant" name = "username" />
</center>
</div>
<br>
<div style = "max-width:470px;">
<center>
<input type = "password" style = "margin-left:20%;"
placeholder = "password" name = "password" />
</center>
</div>
<br>
<div style = "max-width:470px;">
<center>
<button style = "border:0px; background-color:#4285F4; margin-top:8%;
height:35px; width:80%;margin-left:19%;" type = "submit"
value = "Login" >
<strong>Login</strong>
</button>
</center>
</div>
</form>
</body>
</html>
myapp/templates/loggedin.html
<html>
<body>
You are : <strong>{{username}}</strong>
</body>
</html>
################################
- Create myapp/forms.py
from django import forms
class LoginForm(forms.Form):
username = forms.CharField(max_length = 100)
password = forms.CharField(widget = forms.PasswordInput())
def clean_message(self):
username = self.cleaned_data.get("username")
#dbuser = Dreamreal.objects.filter(name = username)
#if not dbuser:
# raise forms.ValidationError("User does not exist in our db!")
return username
2. add new method in myapp/views.py
##############FORM Example#################
Add
from myapp.forms import LoginForm
def login(request):
username = "not logged in"
# If Http method is POST
if request.method == "POST":
#Get the posted form
# Create loginForm object with the data submitted by the user to the server
MyLoginForm = LoginForm(request.POST)
# Validate the received data
if MyLoginForm.is_valid():
# Extract the data from the form object
username = MyLoginForm.cleaned_data['username']
else:
MyLoginForm = LoginForm()
# Pass the extracted user name to the HTML page
return render(request, 'loggedin.html', {"username" : username})
3. Create myapp/templates directory
4. add login.html
<html>
<body>
<form name = "form" action = "{% url "login" %}"
method = "POST" >{% csrf_token %}
<div style = "max-width:470px;">
<center>
<input type = "text" style = "margin-left:20%;"
placeholder = "Identifiant" name = "username" />
</center>
</div>
<br>
<div style = "max-width:470px;">
<center>
<input type = "password" style = "margin-left:20%;"
placeholder = "password" name = "password" />
</center>
</div>
<br>
<div style = "max-width:470px;">
<center>
<button style = "border:0px; background-color:#4285F4; margin-top:8%;
height:35px; width:80%;margin-left:19%;" type = "submit"
value = "Login" >
<strong>Login</strong>
</button>
</center>
</div>
</form>
</body>
</html>
5. create loggedin.html
<html>

   <body>
      You are : <strong>{{username}}</strong>
   </body>

</html>

6. add myapp/urls.py

# path('connection/',views.login,name='login'),
or
 re_path(r'^connection/',TemplateView.as_view(template_name = 'login.html')),
re_path(r'^login/', views.login, name = 'login')
# This connection url name will be used in login.html to forward the data to this url
# The above name=login is referred by url action in form loggin.html
7.http://127.0.0.1:8000/myapp/connection/


########################## Read and  Save student data########################

 1. myapp/models.py
from django.db import models
# Create your models here.
class Trainer(models.Model):
name = models.CharField(max_length = 20)
mail = models.CharField(max_length = 50)
course = models.CharField(max_length = 50)
ph = models.IntegerField()
student = models.ForeignKey('Student', default = 1, null=True, on_delete=models.CASCADE )
def __str__(self): # What to be displayed when Dreamreal.objects.all() is called
return self.name
class Meta:
db_table = "trainer"
class Student(models.Model):
stdnt_name = models.CharField(max_length = 20)
stdnt_mail= models.CharField(max_length = 50)
stdnt_course = models.CharField(max_length = 50)
stdnt_ph = models.IntegerField()
def __str__(self): # What to be displayed when Dreamreal.objects.all() is called
s="name:"+self.stdnt_name+" "+"mail:"+self.stdnt_mail+" "+"Course:"+self.stdnt_course+"Ph:"+self.stdnt_ph
return s
2. myapp/views.py
# Create your views here.
def get_name(request):
context = {}
rec = RegisterForm()
context["form"]=rec
return render(request, "get.html", context)
# Create your views here.
def post(request):
context = {}
rec = RegisterForm()
context["form"]=rec
return render(request, "post.html", context)
from myapp.models import Student
def save(request):
username = "not logged in"
# If Http method is POST
if request.method == "POST":
#Get the posted form
# Create loginForm object with the data submitted by the user to the server
rec = RegisterForm(request.POST)
print(rec)
#username = MyLoginForm.data.get('username')
#print("Login user:",username, " ",MyLoginForm.is_valid())
# Validate the received data
if rec.is_valid():
# Extract the data from the form object
s=Student()
s.stdnt_name = rec.cleaned_data['name']
s.stdnt_ph = rec.cleaned_data['ph']
s.stdnt_course = rec.cleaned_data['course']
mode = rec.cleaned_data['mode']
s.stdnt_mail = rec.cleaned_data['email']
s.save()
#else:
# print("VAlidation failed")
# username="Invalid user name or not registered"
#MyLoginForm = LoginForm()
# Pass the extracted user name to the HTML page
return render(request, 'save.html', {"username" : s})
3. myapp/urls.py
from django.contrib import admin
from django.urls import path,re_path,include
from . import views
from django.views.generic import TemplateView
urlpatterns = [
path('', views.hello_myapp,name='hello_myapp' ),
re_path('display(\d+)', views.hello2,name='id'),
re_path('date(\d+)', views.hello3,name='id'),
re_path(r'^connection/',TemplateView.as_view(template_name = 'login.html')),
re_path(r'^login/', views.login, name = 'login'),
re_path("register", views.register, name="register"),
#re_path(r'^get/',TemplateView.as_view(template_name = 'contact.html')),
re_path("get_name", views.get_name, name="get_name"),
re_path("post", views.post, name="post"),
re_path("save", views.save, name="save"),
]
4. templates

cat post.html
<form method="POST" action = "{% url "save" %}" >
{% csrf_token %}
<table>
{{ form.as_table }}
</table>
<input type="submit" value="Submit">
</form>
cat save.mtml
<html>
<body> Saved record for student : <strong>{{username}}</strong>
</body>
</html>
cat get.html
<form method = "GET">
<label for="your_name">Your name: </label>
<input id="your_name" type="text" name="your_name">
<input type = "submit" value = "Submit">
</form>
Geeks
When one creates a Form class, the most important part is defining the fields of the form. Each field has custom validation logic, along with a few other hooks. This article revolves around various fields one can use in a form along with various features and techniques concerned with Django Forms. Forms are basically used for taking input from the user in some manner and using that information for logical operations on databases. For example, Registering a user by taking input as his name, email, password, etc.
Django maps the fields defined in Django forms into HTML input fields. Django handles three distinct parts of the work involved in forms:
- preparing and restructuring data to make it ready for rendering
- creating HTML forms for the data
- receiving and processing submitted forms and data from the client

Note that all types of work done by Django forms can be done with advanced HTML stuff, but Django makes it easier and efficient especially the validation part. Once you get hold of Django forms you will just forget about HTML forms.
Syntax :
Django Fields work like Django Model Fields and have the syntax :-
field_name = forms.FieldType(**options)
Example –
from django import forms# creating a formclass GeeksForm(forms.Form):title = forms.CharField()description = forms.CharField() |
Using Django Forms
To use Django Forms, one needs to have a project and an app working in it. After you start an app you can create form in app/forms.py. Before starting to use a form let’s check how to start a project and implement Django Forms.
Refer to the following articles to check how to create a project and an app in Django.
Creating a Django Form
Creating a form in Django is completely similar to creating a model, one needs to specify what fields would exist in the form and of what type. For example, to input, a registration form one might need First Name (CharField), Roll Number (IntegerField) and so on.
Syntax
from django import forms

class FormName(models.Model):
         # each field would be mapped as an input field in HTML
        field_name = models.Field(**options)
To create a form, in geeks/forms.py Enter the code,
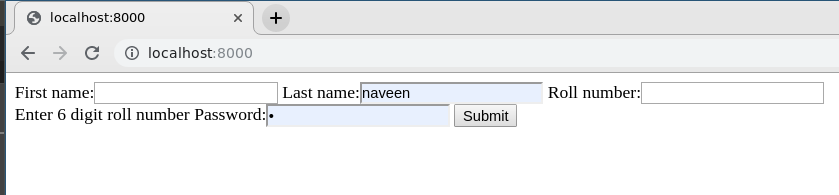
# import the standard Django Forms# from built-in libraryfrom django import forms # creating a form class InputForm(forms.Form): first_name = forms.CharField(max_length = 200) last_name = forms.CharField(max_length = 200) roll_number = forms.IntegerField( help_text = "Enter 6 digit roll number") password = forms.CharField(widget = forms.PasswordInput()) |
To know more about how to create a Form using Django forms, visit How to create a form using Django Forms ?.
Render Django Forms
Django form fields have several built-in methods to ease the work of the developer but sometimes one needs to implement things manually for customizing User Interface(UI). A form comes with 3 in-built methods that can be used to render Django form fields.
- {{ form.as_table }} will render them as table cells wrapped in <tr> tags
- {{ form.as_p }} will render them wrapped in <p> tags
- {{ form.as_ul }} will render them wrapped in <li> tags
To render this form into a view, move to views.py and create a home_view as below.
from django.shortcuts import renderfrom .forms import InputForm# Create your views here.def home_view(request):context ={}context['form']= InputForm()return render(request, "home.html", context) |
In view one needs to just create an instance of the form class created above in forms.py.
Now let’s edit templates > home.html
<form action = "" method = "post">{% csrf_token %}{{form }}<input type="submit" value=Submit"></form> |
Now, visit http://localhost:8000/
 .
.
To check how to use the data rendered by Django Forms visit Render Django Form Fields
Create Django Form from Models
Django ModelForm is a class that is used to directly convert a model into a Django form. If you’re building a database-driven app, chances are you’ll have forms that map closely to Django models. Now when we have our project ready, create a model in geeks/models.py,
# import the standard Django Model# from built-in libraryfrom django.db import models# declare a new model with a name "GeeksModel"class GeeksModel(models.Model):# fields of the modeltitle = models.CharField(max_length = 200)description = models.TextField()last_modified = models.DateTimeField(auto_now_add = True)img = models.ImageField(upload_to = "images/")# renames the instances of the model# with their title namedef __str__(self):return self.title |
To create a form directly for this model, dive into geeks/forms.py and Enter following code,
# import form class from djangofrom django import forms# import GeeksModel from models.pyfrom .models import GeeksModel# create a ModelFormclass GeeksForm(forms.ModelForm):# specify the name of model to useclass Meta:model = GeeksModelfields = "__all__" |
Now visit http://127.0.0.1:8000/,
More on Django Forms
- Render HTML Forms (GET & POST) in Django
- {{ form.as_p }} – Render Django Forms as paragraph
- {{ form.as_table }} – Render Django Forms as table
- {{ form.as_ul }} – Render Django Forms as list
- Django form field custom widgets
- Python | Form validation using django
- Django ModelForm – Create form from Models
- Render Django Form Fields Manually
- Django Formsets
- Django ModelFormSets
Basic form data types and fields list
The most important part of a form and the only required part is the list of fields it defines. Fields are specified by class attributes. Here is a list of all Form Field types used in Django.
| Name | Class | HTML Input |
|---|---|---|
| BooleanField | class BooleanField(**kwargs) | CheckboxInput |
| CharField | class CharField(**kwargs) | TextInput |
| ChoiceField | class ChoiceField(**kwargs) | Select |
| TypedChoiceField | class TypedChoiceField(**kwargs) | Select |
| DateField | class DateField(**kwargs) | DateInput |
| DateTimeField | class DateTimeField(**kwargs) | DateTimeInput |
| DecimalField | class DecimalField(**kwargs) | NumberInput when Field.localize is False, else TextInput |
| DurationField | class DurationField(**kwargs) | TextInput |
| EmailField | class EmailField(**kwargs | EmailInput |
| FileField | class FileField(**kwargs) | ClearableFileInput |
| FilePathField | class FilePathField(**kwargs) | Select |
| FloatField | class FloatField(**kwargs) | NumberInput when Field.localize is False, else TextInput |
| ImageField | class ImageField(**kwargs) | ClearableFileInput |
| IntegerField | class IntegerField(**kwargs) | NumberInput when Field.localize is False, else TextInput |
| GenericIPAddressField | class GenericIPAddressField(**kwargs) | TextInput |
| MultipleChoiceField | class MultipleChoiceField(**kwargs) | SelectMultiple |
| TypedMultipleChoiceField | class TypedMultipleChoiceField(**kwargs) | SelectMultiple |
| NullBooleanField | class NullBooleanField(**kwargs) | NullBooleanSelect |
| RegexField | class RegexField(**kwargs) | TextInput |
| SlugField | class SlugField(**kwargs) | TextInput |
| TimeField | class TimeField(**kwargs) | TimeInput |
| URLField | class URLField(**kwargs) | URLInput |
| UUIDField | class UUIDField(**kwargs) | TextInput |
Core Field Arguments
Core Field arguments are the arguments given to each field for applying some constraint or imparting a particular characteristic to a particular Field. For example, adding an argument required = False to CharField will enable it to be left blank by the user. Each Field class constructor takes at least these arguments. Some Field classes take additional, field-specific arguments, but the following should always be accepted:
| Field Options | Description |
|---|---|
| required | By default, each Field class assumes the value is required, so to make it not required you need to set required=False |
| label | The label argument lets you specify the “human-friendly” label for this field. This is used when the Field is displayed in a Form. |
| label_suffix | The label_suffix argument lets you override the form’s label_suffix on a per-field basis. |
| widget | The widget argument lets you specify a Widget class to use when rendering this Field. See Widgets for more information. |
| help_text | The help_text argument lets you specify descriptive text for this Field. If you provide help_text, it will be displayed next to the Field when the Field is rendered by one of the convenience Form methods. |
| error_messages | The error_messages argument lets you override the default messages that the field will raise. Pass in a dictionary with keys matching the error messages you want to override. |
| validators | The validators argument lets you provide a list of validation functions for this field. |
| localize | The localize argument enables the localization of form data input, as well as the rendered output. |
| disabled. | The disabled boolean argument, when set to True, disables a form field using the disabled HTML attribute so that it won’t be editable by users. |
Attention geek! Strengthen your foundations with the Python Programming Foundation Course and learn the basics.
To begin with, your interview preparations Enhance your Data Structures concepts with the Python DS Course. And to begin with your Machine Learning Journey, join the Machine Learning – Basic Level Course
After creating a Django Form, if one requires some or all fields of the form be filled with some initial data, one can use functionality of Django forms to do so. It is not the same as a placeholder, but this data will be passed into the view when submitted. There are multiple methods to do this, most common being to pass the data dictionary when we initialize the form in Django view. Other methods include passing initial values through form fields or overriding the __init__ method.
How to pass initial data to a Django form ?
Illustration of passing initial data using an Example. Consider a project named geeksforgeeks having an app named geeks.
Refer to the following articles to check how to create a project and an app in Django.
Now let’s create a demo form in “geeks/forms.py”,
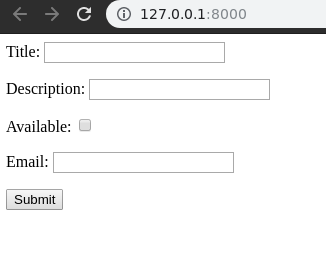
from django import forms // creating a django formclass GeeksForm(forms.Form): title = forms.CharField() description = forms.CharField() available = forms.BooleanField() email = forms.EmailField() |
Now to render this form we need to create the view and template which will be used to display the form to user. In geeks/views.py, create a view
from django.shortcuts import renderfrom .forms import GeeksForm # creating a home viewdef home_view(request): context = {} form = GeeksForm(request.POST or None) context['form'] = form return render(request, "home.html", context) |
and in templates/home.html,
<form method="POST"> {% csrf_token %} {{ form.as_p }} <input type="submit" value="Submit"></form> |
Now let’s display the form by running
Python manage.py runserver
visit http://127.0.0.1:8000/
Method 1 – Adding initial form data in views.py
This first and most commonly used method to add initial data through a dictionary is in view.py during the initialization of a form. Here is the code of views.py with some added data.
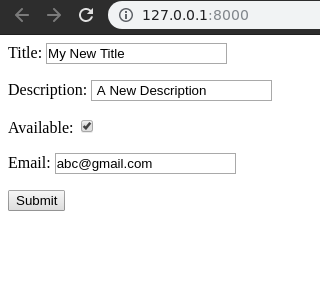
from django.shortcuts import renderfrom .forms import GeeksForm def home_view(request): context ={} # dictionary for initial data with # field names as keys initial_dict = { "title" : "My New Title", "description" : " A New Description", "available":True, "email":"abc@gmail.com" } # add the dictionary during initialization form = GeeksForm(request.POST or None, initial = initial_dict) context['form']= form return render(request, "home.html", context) |
Now open http://127.0.0.1:8000/. This method is senior of all and will override any data provided during other methods.
Method 2 – Adding initial form data using fields in forms.py
One can add initial data using fields in forms.py. An attribute initial is there for this purpose.
In forms.py,
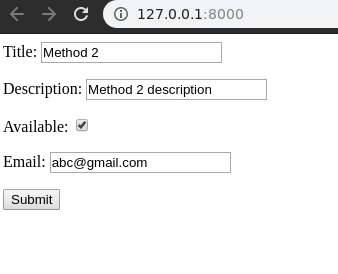
from django import forms class GeeksForm(forms.Form): # adding initial data using initial attribute title = forms.CharField(initial = "Method 2 ") description = forms.CharField(initial = "Method 2 description") available = forms.BooleanField(initial = True) email = forms.EmailField(initial = "abc@gmail.com") |
Now visit, http://127.0.0.1:8000/. One can see the data being updated to method 2.
This way one can add initial data to a form in order to ease the work by a user or any related purpose. This data will be passed to models or views as defined by user and would act as normal data entered by user in the form.
###############Ecample
Forms.py
from django import forms
from analyzer.models import Users
from django.forms import ValidationError
class RtiForm(forms.Form):
rti_no = forms.IntegerField()
rti_label = forms.CharField(max_length = 100)
rti_lrg = forms.CharField(max_length = 100)
rti_dif = forms.CharField(max_length = 100)
rti_symptom = forms.CharField(max_length = 100)
# import GeeksModel from models.py
from .models import RTI
# create a ModelForm
class RTIForm(forms.ModelForm):
# specify the name of model to use
class Meta:
model = RTI
fields = "__all__"
models.py
class RTI(models.Model):
rti_no = models.IntegerField(null=True)
rti_label = models.CharField(max_length = 50)
rti_lrg = models.CharField(max_length = 50)
rti_dif = models.CharField(max_length = 50)
rti_symptom = models.CharField(max_length = 50)
#New_difs=models.ForeignKey('New_difs',on_delete=models.CASCADE )
# student = models.ForeignKey('Student', default = 1, null=True, on_delete=models.CASCADE )
def __str__(self): # What to be displayed when Dreamreal.objects.all() is called
return "RTI no:"+str(self.rti_no)+" LRG Name:"+self.rti_lrg+" DIF name:"+self.rti_dif+" SYMPTOM:"+self.rti_symptom
# class Meta:
# db_table = "trainer"
HTML
<form method="POST" enctype="multipart/form-data">
<!-- Security token -->
{% csrf_token %}
<!-- Using the formset -->
{{ form.as_ul }}
{{ form.as_p }}
{{ form.as_table }}
<input type="submit" value="Submit">
</form>
views.py
path('add/', views.rti_add,name='add' ),
######################SENT DEX########################## ############################################################
we're going to work on handling user accounts, which includes registering, logging in, and logging out. Along with this, we're also going to dynamically change the navigation bar to reflect if a user is logged in or not.
To begin, we need some way to create users. We can actually manually create users now in our Admin page, but of course we probably don't want to do that for every user on our website. Django already has a User model, which you may find is enough for you, or you can extend it later. Checking it out:
$ python3 manage.py shell
Python 3.7.2 (v3.7.2:9a3ffc0492, Dec 24 2018, 02:44:43)
[Clang 6.0 (clang-600.0.57)] on darwin
Type "help", "copyright", "credits" or "license" for more information.
(InteractiveConsole)
>>> from django.contrib.auth.models import User
>>> dir(User)
['DoesNotExist', 'EMAIL_FIELD', 'Meta', 'MultipleObjectsReturned', 'REQUIRED_FIELDS', 'USERNAME_FIELD', '__class__', '__delattr__', '__dict__', '__dir__', '__doc__', '__eq__', '__format__', '__ge__', '__getattribute__', '__getstate__', '__gt__', '__hash__', '__init__', '__init_subclass__', '__le__', '__lt__', '__module__', '__ne__', '__new__', '__reduce__', '__reduce_ex__', '__repr__', '__setattr__', '__setstate__', '__sizeof__', '__str__', '__subclasshook__', '__weakref__', '_check_column_name_clashes', '_check_field_name_clashes', '_check_fields', '_check_id_field', '_check_index_together', '_check_indexes', '_check_local_fields', '_check_long_column_names', '_check_m2m_through_same_relationship', '_check_managers', '_check_model', '_check_model_name_db_lookup_clashes', '_check_ordering', '_check_property_name_related_field_accessor_clashes', '_check_single_primary_key', '_check_swappable', '_check_unique_together', '_do_insert', '_do_update', '_get_FIELD_display', '_get_next_or_previous_by_FIELD', '_get_next_or_previous_in_order', '_get_pk_val', '_get_unique_checks', '_meta', '_password', '_perform_date_checks', '_perform_unique_checks', '_save_parents', '_save_table', '_set_pk_val', 'check', 'check_password', 'clean', 'clean_fields', 'date_error_message', 'date_joined', 'delete', 'email', 'email_user', 'first_name', 'from_db', 'full_clean', 'get_all_permissions', 'get_deferred_fields', 'get_email_field_name', 'get_full_name', 'get_group_permissions', 'get_next_by_date_joined', 'get_previous_by_date_joined', 'get_session_auth_hash', 'get_short_name', 'get_username', 'groups', 'has_module_perms', 'has_perm', 'has_perms', 'has_usable_password', 'id', 'is_active', 'is_anonymous', 'is_authenticated', 'is_staff', 'is_superuser', 'last_login', 'last_name', 'logentry_set', 'natural_key', 'normalize_username', 'objects', 'password', 'pk', 'prepare_database_save', 'refresh_from_db', 'save', 'save_base', 'serializable_value', 'set_password', 'set_unusable_password', 'unique_error_message', 'user_permissions', 'username', 'username_validator', 'validate_unique']
>>>
Noting some of those attributes, we can see there are fields for username, email, names...etc.
So let's go into main's templates, and copy the home.html file and call the copy register.html, modifying it to be:
{% extends 'main/header.html' %}

{% block content %}

    <form method="POST">
        {% csrf_token %}
        {{form}}
    </form>

    If you already have an account <a href="/login" target="blank"><strong>login</strong></a> instead.

{% endblock %}
Alright, some basics here, the form tag just denotes that there will be a form, and the method means this will create a POST request (meaning data will be submitted), as opposed to a GET request where the hope is to get some data in return.
Next, we have
{% csrf_token %}
This is a special token aimed at combatting something called Cross Site Request Forgery, which you can learn more about here: Cross-Site Request Forgery (CSRF).
Next, we just have a simple form variable, which you should be able to guess is going to be passed as context into this template. Finally, we just have a bit of text in case the user miss-clicked to signup, and just needs to go to login instead.
Let's head to mysite/main/views.py
We will call this function register. While we could build this form, we can also import the user creation form:
from django.contrib.auth.forms import UserCreationForm
Then build the register function:
def register(request):
    form = UserCreationForm
    return render(request = request,
                  template_name = "main/register.html",
                  context={"form":form})
Okay, the template is done, the view is done. That's the model and the view boxes checked. All that's left is the controller! Head to mysite/main/urls.py and let's add that now!
We just need to add the path:
path("/register", views.register, name="register"),
Full file:
from django.urls import path
from . import views


app_name = 'main'  # here for namespacing of urls.

urlpatterns = [
  path("", views.homepage, name="homepage"),
  path("register/", views.register, name="register"),
]
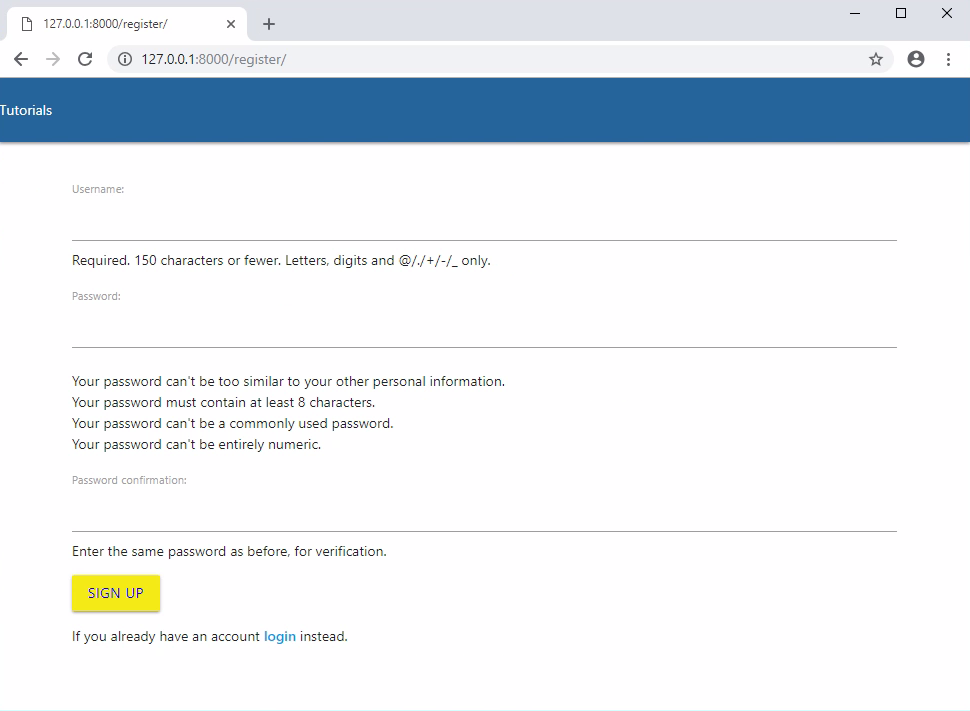
Are we done? I think we're done! Let's click on register in the navbar!
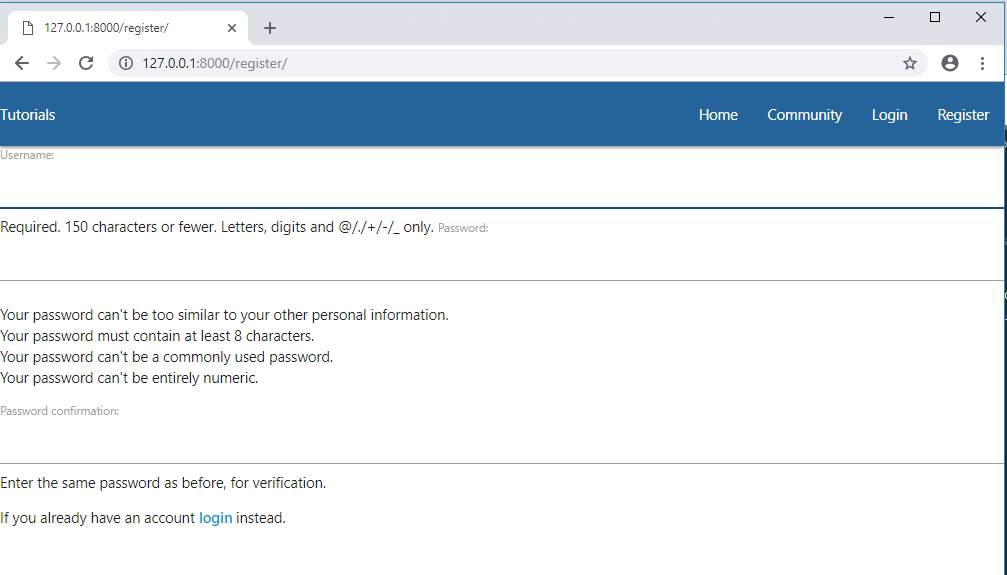
Okay, we're off to a decent start. I wish the form was not right up to the left edge like that though. Let's fix that by putting the body content in a container div.
mysite/main/templates/main/header.html... <div class="container"> {% block content %} {% endblock %} </div> ...
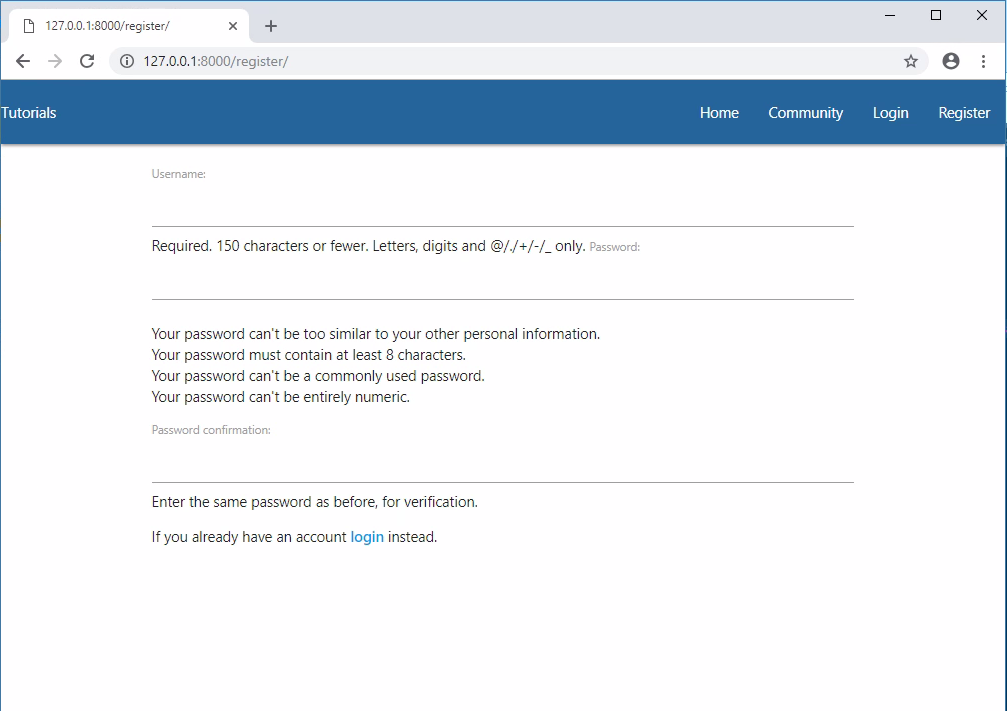
Then maybe a break or two in the register.html
{% extends 'main/header.html' %}

{% block content %}
    <br>
    <form method="POST">
        {% csrf_token %}
        {{form}}
    </form>

    If you already have an account <a href="/login" target="blank"><strong>login</strong></a> instead.

{% endblock %}
Great, but the form doesn't actually do anything, so let's change that next!
Inside our form tags, let's add a submit button:
<button style="background-color:#F4EB16; color:blue" class="btn btn-outline-info" type="submit">Sign Up</button>
So now our full mysite/main/templates/main/register page is:
{% extends 'main/header.html' %}

{% block content %}

    <div class="container">
        <form method="POST">
            {% csrf_token %}
            {{form.as_p}}

            <button style="background-color:#F4EB16; color:blue" class="btn btn-outline-info" type="submit">Sign Up</button>

        </form>

        If you already have an account <a href="/login" target="blank"><strong>login</strong></a> instead.
    </div>
{% endblock %}
Next, forms have various attributes that we can use:
as_p- paragraph tagsas_table- as a tableas_ul- as an unordered list
You might not have noticed, but our form is a little confusing at the first passowrd, it's hard to tell what goes there at a quick glance. let's instead set our form as_p to remedy this. Full page:
{% extends 'main/header.html' %}

{% block content %}
    <br>
    <form method="POST">
        {% csrf_token %}
        {{form.as_p}}
        <button style="background-color:#F4EB16; color:blue" class="btn btn-outline-info" type="submit">Sign Up</button>
    </form>

    If you already have an account <a href="/login" target="blank"><strong>login</strong></a> instead.

{% endblock %}
Now that our form has a submit button, we can fill out the form, try to sign up... but nothing happens? Well, right now our registration page has no handling for when there's a POST request, so it's actually just reloading the registration page. Where might we need to edit in order to handle for this type of request?
We can handle for specific requests and other types of logic from within our views.py, under the register function that we've started.
The very first thing we should do is check to see if the request made to this page has been a POST:
if request.method == "POST":
If it has, then we're going to map the submitted form to the UserCreationForm:
form = UserCreationForm(request.POST)
If the form is valid, then we just save this new User object (which is part of the form, so we save the form)
user = form.save()
This will save the user, but, in general, it's nice if the user just registered to also log them in so they don't need to re-type things again. To do this, we can just use Django's login function which we can grab from django.contrib.auth, which also gives use logout, and authenticate...all of which we'll need, so let's grab all three with:
from django.contrib.auth import logout, authenticate, login
So now we can log in the user with:
            username = form.cleaned_data.get('username')
            login(request, user)
Now we just want to send the user to the homepage. While we could just...render...the homepage now, we also need to change the URL, and, since we're actually sending them to the homepage, we want to redirect them there now. Add redirect to your imports from django.shortcuts:
from django.shortcuts import render, redirect
So now we can just do:
return redirect("main:homepage")
This will look in urls.py for the app_name called main (recall we did this with: app_name = 'main' ), then it finds the url with the name of "homepage." So now our full register function is:
def register(request):
  if request.method == "POST":
        form = UserCreationForm(request.POST)
        if form.is_valid():
            user = form.save()
            username = form.cleaned_data.get('username')
            login(request, user)
            return redirect("main:homepage")

    form = UserCreationForm
    return render(request = request,
                  template_name = "main/register.html",
                  context={"form":form})
In some cases, the form wont be valid for whatever reason, however, so we also need to handle for that:
def register(request):
    if request.method == "POST":
        form = UserCreationForm(request.POST)
        if form.is_valid():
            user = form.save()
            username = form.cleaned_data.get('username')
            login(request, user)
            return redirect("main:homepage")

        else:
            for msg in form.error_messages:
                print(form.error_messages[msg])

            return render(request = request,
                          template_name = "main/register.html",
                          context={"form":form})

    form = UserCreationForm
    return render(request = request,
                  template_name = "main/register.html",
                  context={"form":form})
Now, we can register another user, then they're sent back to the homepage!
Full views.py just in case you're missing something:
from django.shortcuts import render, redirect
from .models import Tutorial
from django.contrib.auth.forms import UserCreationForm, AuthenticationForm
from django.contrib.auth import logout, authenticate, login


# Create your views here.
def homepage(request):
    return render(request = request,
                  template_name='main/home.html',
                  context = {"tutorials":Tutorial.objects.all})

def register(request):
    if request.method == "POST":
        form = UserCreationForm(request.POST)
        if form.is_valid():
            user = form.save()
            username = form.cleaned_data.get('username')
            login(request, user)
            return redirect("main:homepage")

        else:
            for msg in form.error_messages:
                print(form.error_messages[msg])

            return render(request = request,
                          template_name = "main/register.html",
                          context={"form":form})

    form = UserCreationForm
    return render(request = request,
                  template_name = "main/register.html",
                  context={"form":form})
So now we've found ourselves at a point where we need something more than a print statement for information. There's nothing to inform the user once they've logged in, and there's nothing to tell us that we've done something wrong if we have. This is where messaging comes in, which is what we'll be talking about in the next tutorial, along with some other changes for the user on login.
DateField
- class
DateField(**kwargs) -
- Default widget:
DateInput - Empty value:
None - Normalizes to: A Python
datetime.dateobject. - Validates that the given value is either a
datetime.date,datetime.datetimeor string formatted in a particular date format. - Error message keys:
required,invalid
Takes one optional argument:
input_formats- A list of formats used to attempt to convert a string to a valid
datetime.dateobject.
If no
input_formatsargument is provided, the default input formats are taken fromDATE_INPUT_FORMATSifUSE_L10NisFalse, or from the active locale formatDATE_INPUT_FORMATSkey if localization is enabled. See also format localization. - Default widget:
EmailField
- class
EmailField(**kwargs) -
- Default widget:
EmailInput - Empty value: Whatever you’ve given as
empty_value. - Normalizes to: A string.
- Uses
EmailValidatorto validate that the given value is a valid email address, using a moderately complex regular expression. - Error message keys:
required,invalid
Has three optional arguments
max_length,min_length, andempty_valuewhich work just as they do forCharField. - Default widget:
FileField
- class
FileField(**kwargs) -
- Default widget:
ClearableFileInput - Empty value:
None - Normalizes to: An
UploadedFileobject that wraps the file content and file name into a single object. - Can validate that non-empty file data has been bound to the form.
- Error message keys:
required,invalid,missing,empty,max_length
Has two optional arguments for validation,
max_lengthandallow_empty_file. If provided, these ensure that the file name is at most the given length, and that validation will succeed even if the file content is empty.To learn more about the
UploadedFileobject, see the file uploads documentation.When you use a
FileFieldin a form, you must also remember to bind the file data to the form.The
max_lengtherror refers to the length of the filename. In the error message for that key,%(max)dwill be replaced with the maximum filename length and%(length)dwill be replaced with the current filename length. - Default widget:
FilePathField
- class
FilePathField(**kwargs) -
- Default widget:
Select - Empty value:
''(an empty string) - Normalizes to: A string.
- Validates that the selected choice exists in the list of choices.
- Error message keys:
required,invalid_choice
The field allows choosing from files inside a certain directory. It takes five extra arguments; only
pathis required:path- The absolute path to the directory whose contents you want listed. This directory must exist.
recursive- If
False(the default) only the direct contents ofpathwill be offered as choices. IfTrue, the directory will be descended into recursively and all descendants will be listed as choices.
match- A regular expression pattern; only files with names matching this expression will be allowed as choices.
allow_files- Optional. Either
TrueorFalse. Default isTrue. Specifies whether files in the specified location should be included. Either this orallow_foldersmust beTrue.
allow_folders- Optional. Either
TrueorFalse. Default isFalse. Specifies whether folders in the specified location should be included. Either this orallow_filesmust beTrue.
- Default widget:
ImageField
- class
ImageField(**kwargs)¶ -
- Default widget:
ClearableFileInput - Empty value:
None - Normalizes to: An
UploadedFileobject that wraps the file content and file name into a single object. - Validates that file data has been bound to the form. Also uses
FileExtensionValidatorto validate that the file extension is supported by Pillow. - Error message keys:
required,invalid,missing,empty,invalid_image
Using an
ImageFieldrequires that Pillow is installed with support for the image formats you use. If you encounter acorrupt imageerror when you upload an image, it usually means that Pillow doesn’t understand its format. To fix this, install the appropriate library and reinstall Pillow.When you use an
ImageFieldon a form, you must also remember to bind the file data to the form.After the field has been cleaned and validated, the
UploadedFileobject will have an additionalimageattribute containing the Pillow Image instance used to check if the file was a valid image. Pillow closes the underlying file descriptor after verifying an image, so whilst non-image data attributes, such asformat,height, andwidth, are available, methods that access the underlying image data, such asgetdata()orgetpixel(), cannot be used without reopening the file. For example:>>> from PIL import Image >>> from django import forms >>> from django.core.files.uploadedfile import SimpleUploadedFile >>> class ImageForm(forms.Form): ... img = forms.ImageField() >>> file_data = {'img': SimpleUploadedFile('test.png', <file data>)} >>> form = ImageForm({}, file_data) # Pillow closes the underlying file descriptor. >>> form.is_valid() True >>> image_field = form.cleaned_data['img'] >>> image_field.image <PIL.PngImagePlugin.PngImageFile image mode=RGBA size=191x287 at 0x7F5985045C18> >>> image_field.image.width 191 >>> image_field.image.height 287 >>> image_field.image.format 'PNG' >>> image_field.image.getdata() # Raises AttributeError: 'NoneType' object has no attribute 'seek'. >>> image = Image.open(image_field) >>> image.getdata() <ImagingCore object at 0x7f5984f874b0>
Additionally,
UploadedFile.content_typewill be updated with the image’s content type if Pillow can determine it, otherwise it will be set toNone. - Default widget:
#####################SENT DEX#####################
LOGIN LOGOUT
#############################
Welcome to part 8 of the web development with Python and Django tutorial series. Here, we're going to continue working on our user handling and we will be bringing in the ability for a user to login and log out.
Let's start with logout, since that's super easy. We don't need to design anything for it and Django already has a logout function!
Okay, let's start with the URL, it should be /logout, so let's head into main/mysite/urls.py and add a path for that:
from django.urls import path
from . import views


app_name = 'main'  # here for namespacing of urls.

urlpatterns = [
    path("", views.homepage, name="homepage"),
    path("register/", views.register, name="register"),
    path("logout", views.logout_request, name="logout"),
]
Now that we have the URL for it, let's create the view, which we've already decided will be a function called logout_request
Here's a great example of where you might decide to call your function "logout"...but we're trying to use logout from Django. We'd definitely like to not make that mistake, so make sure to not call it the same as the function we're going to be trying to use. Same thing when we go to make our login function...we'll have to call it something other than that!
mysite/main/views.py
...
  def logout_request(request):
    logout(request)
    messages.info(request, "Logged out successfully!")
    return redirect("main:homepage")
  ...
Now, refresh our website, and click logout. Works!
Okay, now seems like a good time to do the login page. To begin, let's start in views.py since we're already here anyway. We'll start with:
from django.contrib.auth.forms import UserCreationForm, AuthenticationForm

...

def login_request(request):
    form = AuthenticationForm()
    return render(request = request,
                  template_name = "main/login.html",
                  context={"form":form})
Next, let's work on the html page: mysite/main/templates/main/login.html
{% extends 'main/header.html' %}

{% block content %}

    <div class="container">
        <form method="POST">
        {% csrf_token %}
        {{form.as_p}}
            <button style="background-color:#F4EB16; color:blue" class="btn btn-outline-info" type="submit">Login</button>
        </form>
        Don't have an account? <a href="/register" target="blank"><strong>register here</strong></a>!
    </div>
{% endblock %}
Finally, we just need to add a link in urls.py:
path("login", views.login_request, name="login"),
Okay, now if we go to http://127.0.0.1:8000/login, we can see a login page. Awesome, except that, just like our registration page, nothing will happen unless we handle for the POST request, which is where the meat of this page will actually be:
mysite/main/views.py
def login_request(request):
    if request.method == 'POST':
        form = AuthenticationForm(request=request, data=request.POST)
        if form.is_valid():
            username = form.cleaned_data.get('username')
            password = form.cleaned_data.get('password')
            user = authenticate(username=username, password=password)
            if user is not None:
                login(request, user)
                messages.info(request, f"You are now logged in as {username}")
                return redirect('/')
            else:
                messages.error(request, "Invalid username or password.")
        else:
            messages.error(request, "Invalid username or password.")
    form = AuthenticationForm()
    return render(request = request,
                    template_name = "main/login.html",
                    context={"form":form})
With that, go ahead and try the login functionality and you should find that you're all set.
Finally, let's change one last thing about our user registration. At the moment, we're not collecting the user's email, which could turn out to be fairly problematic later for things like forgotten passwords. How can we change this? We could either completely build our own form, or we could just modify the Django one a bit. I am going to opt to just extend the Django form. To do this, create a new file: mysite/main/forms.py:
forms.py
from django import forms
from django.contrib.auth.forms import UserCreationForm
from django.contrib.auth.models import User

class NewUserForm(UserCreationForm):
    email = forms.EmailField(required=True)

    class Meta:
        model = User
        fields = ("username", "email", "password1", "password2")

    def save(self, commit=True):
        user = super(NewUserForm, self).save(commit=False)
        user.email = self.cleaned_data["email"]
        if commit:
            user.save()
        return user
Then, inside of our views.py, we instead need to import our NewUserForm
views.py
from .forms import NewUserForm
Then replace the two instances of UserCreationForm with NewUserForm in the register function. Now make sure you're logged out and register a new user. This time, there will be a password field.
We didn't need to update any models because we're using the Django User model, which already had an email field.
Next, if we were to actually add full-length tutorials, we'd be in some trouble, because our home page would be quickly filled up. We'll be talking about how to handle for this by using foreign keys to point to tutorial series and categories.
from myapp.models import Student
def save(request):
username = "not logged in"
# If Http method is POST
if request.method == "POST":
#Get the posted form
# Create loginForm object with the data submitted by the user to the server
rec = RegisterForm(request.POST)
print(rec)
#username = MyLoginForm.data.get('username')
#print("Login user:",username, " ",MyLoginForm.is_valid())
# Validate the received data
if rec.is_valid():
# Extract the data from the form object
s=Student()
s.stdnt_name = rec.cleaned_data['name']
s.stdnt_ph = rec.cleaned_data['ph']
s.stdnt_course = rec.cleaned_data['course']
mode = rec.cleaned_data['mode']
s.stdnt_mail = rec.cleaned_data['email']
s.save()
#else:
# print("VAlidation failed")
# username="Invalid user name or not registered"
#MyLoginForm = LoginForm()
# Pass the extracted user name to the HTML page
return render(request, 'save.html', {"username" : s})
Creating forms in Django, is really similar to creating a model. Here again, we just need to inherit from Django class and the class attributes will be the form fields. Let's add a forms.py file in myapp folder to contain our app forms. We will create a login form.
myapp/forms.py
#-*- coding: utf-8 -*-
from django import forms

class LoginForm(forms.Form):
   user = forms.CharField(max_length = 100)
   password = forms.CharField(widget = forms.PasswordInput())
As seen above, the field type can take "widget" argument for html rendering; in our case, we want the password to be hidden, not displayed. Many others widget are present in Django: DateInput for dates, CheckboxInput for checkboxes, etc.
Form fields
- class
Field(**kwargs)
When you create a Form class, the most important part is defining the fields of the form. Each field has custom validation logic, along with a few other hooks.
Field.clean(value)
Although the primary way you’ll use Field classes is in Form classes, you can also instantiate them and use them directly to get a better idea of how they work. Each Field instance has a clean() method, which takes a single argument and either raises a django.core.exceptions.ValidationError exception or returns the clean value:
>>> from django import forms
>>> f = forms.EmailField()
>>> f.clean('foo@example.com')
'foo@example.com'
>>> f.clean('invalid email address')
Traceback (most recent call last):
...
ValidationError: ['Enter a valid email address.']
Core field arguments
Each Field class constructor takes at least these arguments. Some Field classes take additional, field-specific arguments, but the following should always be accepted:
required
Field.required
By default, each Field class assumes the value is required, so if you pass an empty value – either None or the empty string ("") – then clean() will raise a ValidationError exception:
>>> from django import forms
>>> f = forms.CharField()
>>> f.clean('foo')
'foo'
>>> f.clean('')
Traceback (most recent call last):
...
ValidationError: ['This field is required.']
>>> f.clean(None)
Traceback (most recent call last):
...
ValidationError: ['This field is required.']
>>> f.clean(' ')
' '
>>> f.clean(0)
'0'
>>> f.clean(True)
'True'
>>> f.clean(False)
'False'
To specify that a field is not required, pass required=False to the Field constructor:
>>> f = forms.CharField(required=False)
>>> f.clean('foo')
'foo'
>>> f.clean('')
''
>>> f.clean(None)
''
>>> f.clean(0)
'0'
>>> f.clean(True)
'True'
>>> f.clean(False)
'False'
if a Field has required=False and you pass clean() an empty value, then clean() will return a normalized empty value rather than raising ValidationError. For CharField, this will return empty_value which defaults to an empty string. For other Field classes, it might be None. (This varies from field to field.)
Widgets of required form fields have the required HTML attribute. Set the Form.use_required_attribute attribute to False to disable it. The required attribute isn’t included on forms of formsets because the browser validation may not be correct when adding and deleting formsets.
label
Field.label
The label argument lets you specify the “human-friendly” label for this field. This is used when the Field is displayed in a Form.
As explained in “Outputting forms as HTML” above, the default label for a Field is generated from the field name by converting all underscores to spaces and upper-casing the first letter. Specify label if that default behavior doesn’t result in an adequate label.
Here’s a full example Form that implements label for two of its fields. We’ve specified auto_id=False to simplify the output:
>>> from django import forms
>>> class CommentForm(forms.Form):
...     name = forms.CharField(label='Your name')
...     url = forms.URLField(label='Your website', required=False)
...     comment = forms.CharField()
>>> f = CommentForm(auto_id=False)
>>> print(f)
<tr><th>Your name:</th><td><input type="text" name="name" required></td></tr>
<tr><th>Your website:</th><td><input type="url" name="url"></td></tr>
<tr><th>Comment:</th><
initial
Field.initial
The initial argument lets you specify the initial value to use when rendering this Field in an unbound Form.
To specify dynamic initial data, see the Form.initial parameter.
The use-case for this is when you want to display an “empty” form in which a field is initialized to a particular value. For example:
>>> from django import forms
>>> class CommentForm(forms.Form):
...     name = forms.CharField(initial='Your name')
...     url = forms.URLField(initial='http://')
...     comment = forms.CharField()
>>> f = CommentForm(auto_id=False)
>>> print(f)
<tr><th>Name:</th><td><input type="text" name="name" value="Your name" required></td></tr>
<tr><th>Url:</th><td><input type="url" name="url" value="http://" required></td></tr>
<tr><th>Comment:</th><td><input type="text" name="comment" required></td></tr>
You may be thinking, why not just pass a dictionary of the initial values as data when displaying the form? Well, if you do that, you’ll trigger validation, and the HTML output will include any validation errors:
>>> class CommentForm(forms.Form):
widget
Field.widget
The widget argument lets you specify a Widget class to use when rendering this Field. See Widgets for more information
Built-in Field classes
Naturally, the forms library comes with a set of Field classes that represent common validation needs. This section documents each built-in field.
For each field, we describe the default widget used if you don’t specify widget. We also specify the value returned when you provide an empty value (see the section on required above to understand what that means).
BooleanField
- class
BooleanField(**kwargs) -
- Default widget:
CheckboxInput - Empty value:
False - Normalizes to: A Python
TrueorFalsevalue. - Validates that the value is
True(e.g. the check box is checked) if the field hasrequired=True. - Error message keys:
required
- Default widget:
CharField
- class
CharField(**kwargs) -
- Default widget:
TextInput - Empty value: Whatever you’ve given as
empty_value. - Normalizes to: A string.
- Uses
MaxLengthValidatorandMinLengthValidatorifmax_lengthandmin_lengthare provided. Otherwise, all inputs are valid. - Error message keys:
required,max_length,min_length
Has four optional arguments for validation:
max_length
min_length- If provided, these arguments ensure that the string is at most or at least the given length.
strip- If
True(default), the value will be stripped of leading and trailing whitespace.
empty_value- The value to use to represent “empty”. Defaults to an empty string.
- Default widget:
ChoiceField
- class
ChoiceField(**kwargs) -
- Default widget:
Select - Empty value:
''(an empty string) - Normalizes to: A string.
- Validates that the given value exists in the list of choices.
- Error message keys:
required,invalid_choice
The
invalid_choiceerror message may contain%(value)s, which will be replaced with the selected choice.Takes one extra argument:
choices- Either an iterable of 2-tuples to use as choices for this field, enumeration choices, or a callable that returns such an iterable. This argument accepts the same formats as the
choicesargument to a model field. See the model field reference documentation on choices for more details. If the argument is a callable, it is evaluated each time the field’s form is initialized, in addition to during rendering. Defaults to an empty list.
- Default widget:
TypedChoiceField
- class
TypedChoiceField(**kwargs) - Just like a
ChoiceField, exceptTypedChoiceFieldtakes two extra arguments,coerceandempty_value.- Default widget:
Select - Empty value: Whatever you’ve given as
empty_value. - Normalizes to: A value of the type provided by the
coerceargument. - Validates that the given value exists in the list of choices and can be coerced.
- Error message keys:
required,invalid_choice
Takes extra arguments:
coerce- A function that takes one argument and returns a coerced value. Examples include the built-in
int,float,booland other types. Defaults to an identity function. Note that coercion happens after input validation, so it is possible to coerce to a value not present inchoices.
empty_value- The value to use to represent “empty.” Defaults to the empty string;
Noneis another common choice here. Note that this value will not be coerced by the function given in thecoerceargument, so choose it accordingly.
- Default widget:
URLField
- class
URLField(**kwargs) -
- Default widget:
URLInput - Empty value: Whatever you’ve given as
empty_value. - Normalizes to: A string.
- Uses
URLValidatorto validate that the given value is a valid URL. - Error message keys:
required,invalid
Has three optional arguments
max_length,min_length, andempty_valuewhich work just as they do forCharField. - Default widget:
EmailField
- class
EmailField(**kwargs) -
- Default widget:
EmailInput - Empty value: Whatever you’ve given as
empty_value. - Normalizes to: A string.
- Uses
EmailValidatorto validate that the given value is a valid email address, using a moderately complex regular expression. - Error message keys:
required,invalid
Has three optional arguments
max_length,min_length, andempty_valuewhich work just as they do forCharField. - Default widget:
FileField
- class
FileField(**kwargs)¶ -
- Default widget:
ClearableFileInput - Empty value:
None - Normalizes to: An
UploadedFileobject that wraps the file content and file name into a single object. - Can validate that non-empty file data has been bound to the form.
- Error message keys:
required,invalid,missing,empty,max_length
Has two optional arguments for validation,
max_lengthandallow_empty_file. If provided, these ensure that the file name is at most the given length, and that validation will succeed even if the file content is empty.To learn more about the
UploadedFileobject, see the file uploads documentation.When you use a
FileFieldin a form, you must also remember to bind the file data to the form.The
max_lengtherror refers to the length of the filename. In the error message for that key,%(max)dwill be replaced with the maximum filename length and%(length)dwill be replaced with the current filename length. - Default widget:
FilePathField
- class
FilePathField(**kwargs)¶ -
- Default widget:
Select - Empty value:
''(an empty string) - Normalizes to: A string.
- Validates that the selected choice exists in the list of choices.
- Error message keys:
required,invalid_choice
The field allows choosing from files inside a certain directory. It takes five extra arguments; only
pathis required:path¶- The absolute path to the directory whose contents you want listed. This directory must exist.
recursive¶- If
False(the default) only the direct contents ofpathwill be offered as choices. IfTrue, the directory will be descended into recursively and all descendants will be listed as choices.
match¶- A regular expression pattern; only files with names matching this expression will be allowed as choices.
allow_files¶- Optional. Either
TrueorFalse. Default isTrue. Specifies whether files in the specified location should be included. Either this orallow_foldersmust beTrue.
allow_folders¶- Optional. Either
TrueorFalse. Default isFalse. Specifies whether folders in the specified location should be included. Either this orallow_filesmust beTrue.
- Default widget:
IntegerField
- class
IntegerField(**kwargs)¶ -
- Default widget:
NumberInputwhenField.localizeisFalse, elseTextInput. - Empty value:
None - Normalizes to: A Python integer.
- Validates that the given value is an integer. Uses
MaxValueValidatorandMinValueValidatorifmax_valueandmin_valueare provided. Leading and trailing whitespace is allowed, as in Python’sint()function. - Error message keys:
required,invalid,max_value,min_value
The
max_valueandmin_valueerror messages may contain%(limit_value)s, which will be substituted by the appropriate limit.Takes two optional arguments for validation:
max_value
min_value¶- These control the range of values permitted in the field.
- Default widget:
Using Form in a View
There are two kinds of HTTP requests, GET and POST. In Django, the request object passed as parameter to your view has an attribute called "method" where the type of the request is set, and all data passed via POST can be accessed via the request.POST dictionary.
Let's create a login view in our myapp/views.py −
#-*- coding: utf-8 -*-
from myapp.forms import LoginForm

def login(request):
   username = "not logged in"

   if request.method == "POST":
      #Get the posted form
      MyLoginForm = LoginForm(request.POST)

      if MyLoginForm.is_valid():
         username = MyLoginForm.cleaned_data['username']
   else:
      MyLoginForm = Loginform()

   return render(request, 'loggedin.html', {"username" : username})
The view will display the result of the login form posted through the loggedin.html. To test it, we will first need the login form template. Let's call it login.html.
<html>
   <body>

      <form name = "form" action = "{% url "myapp.views.login" %}"
         method = "POST" >{% csrf_token %}

         <div style = "max-width:470px;">
            <center>
               <input type = "text" style = "margin-left:20%;"
                  placeholder = "Identifiant" name = "username" />
            </center>
         </div>

         <br>

         <div style = "max-width:470px;">
            <center>
               <input type = "password" style = "margin-left:20%;"
                  placeholder = "password" name = "password" />
            </center>
         </div>

         <br>

         <div style = "max-width:470px;">
            <center>

               <button style = "border:0px; background-color:#4285F4; margin-top:8%;
                  height:35px; width:80%;margin-left:19%;" type = "submit"
                  value = "Login" >
                  <strong>Login</strong>
               </button>

            </center>
         </div>

      </form>

   </body>
</html>
The template will display a login form and post the result to our login view above. You have probably noticed the tag in the template, which is just to prevent Cross-site Request Forgery (CSRF) attack on your site.
{% csrf_token %}
Once we have the login template, we need the loggedin.html template that will be rendered after form treatment.
<html>

   <body>
      You are : <strong>{{username}}</strong>
   </body>

</html>
Now, we just need our pair of URLs to get started: myapp/urls.py
from django.conf.urls import patterns, url
from django.views.generic import TemplateView

urlpatterns = patterns('myapp.views',
   url(r'^connection/',TemplateView.as_view(template_name = 'login.html')),
   url(r'^login/', 'login', name = 'login'))
When accessing "/myapp/connection", we will get the following login.html template rendered −
On the form post, the form is valid. In our case make sure to fill the two fields and you will get −
In case your username is polo, and you forgot the password. You will get the following message −
Using Our Own Form Validation
In the above example, when validating the form −
MyLoginForm.is_valid()
We only used Django self-form validation engine, in our case just making sure the fields are required. Now let’s try to make sure the user trying to login is present in our DB as Dreamreal entry. For this, change the myapp/forms.py to −
#-*- coding: utf-8 -*-
from django import forms
from myapp.models import Dreamreal

class LoginForm(forms.Form):
   user = forms.CharField(max_length = 100)
   password = forms.CharField(widget = forms.PasswordInput())

   def clean_message(self):
      username = self.cleaned_data.get("username")
      dbuser = Dreamreal.objects.filter(name = username)

      if not dbuser:
         raise forms.ValidationError("User does not exist in our db!")
      return username
Now, after calling the "is_valid" method, we will get the correct output, only if the user is in our database. If you want to check a field of your form, just add a method starting by "clean_" then your field name to your form class. Raising a forms.ValidationError is important.
Geeks
When one creates a Form class, the most important part is defining the fields of the form. Each field has custom validation logic, along with a few other hooks. This article revolves around various fields one can use in a form along with various features and techniques concerned with Django Forms. Forms are basically used for taking input from the user in some manner and using that information for logical operations on databases. For example, Registering a user by taking input as his name, email, password, etc.
Django maps the fields defined in Django forms into HTML input fields. Django handles three distinct parts of the work involved in forms:
- preparing and restructuring data to make it ready for rendering
- creating HTML forms for the data
- receiving and processing submitted forms and data from the client
Note that all types of work done by Django forms can be done with advanced HTML stuff, but Django makes it easier and efficient especially the validation part. Once you get hold of Django forms you will just forget about HTML forms.
Syntax :
Django Fields work like Django Model Fields and have the syntax :-
field_name = forms.FieldType(**options)
Example –
from django import forms# creating a formclass GeeksForm(forms.Form):title = forms.CharField()description = forms.CharField() |
Using Django Forms
To use Django Forms, one needs to have a project and an app working in it. After you start an app you can create form in app/forms.py. Before starting to use a form let’s check how to start a project and implement Django Forms.
Refer to the following articles to check how to create a project and an app in Django.
Creating a Django Form
Creating a form in Django is completely similar to creating a model, one needs to specify what fields would exist in the form and of what type. For example, to input, a registration form one might need First Name (CharField), Roll Number (IntegerField) and so on.
Syntax
from django import forms

class FormName(models.Model):
         # each field would be mapped as an input field in HTML
        field_name = models.Field(**options)
To create a form, in geeks/forms.py Enter the code,
# import the standard Django Forms# from built-in libraryfrom django import forms # creating a form class InputForm(forms.Form): first_name = forms.CharField(max_length = 200) last_name = forms.CharField(max_length = 200) roll_number = forms.IntegerField( help_text = "Enter 6 digit roll number") password = forms.CharField(widget = forms.PasswordInput()) |
To know more about how to create a Form using Django forms, visit How to create a form using Django Forms ?.
Render Django Forms
Django form fields have several built-in methods to ease the work of the developer but sometimes one needs to implement things manually for customizing User Interface(UI). A form comes with 3 in-built methods that can be used to render Django form fields.
- {{ form.as_table }} will render them as table cells wrapped in <tr> tags
- {{ form.as_p }} will render them wrapped in <p> tags
- {{ form.as_ul }} will render them wrapped in <li> tags
To render this form into a view, move to views.py and create a home_view as below.
from django.shortcuts import renderfrom .forms import InputForm# Create your views here.def home_view(request):context ={}context['form']= InputForm()return render(request, "home.html", context) |
In view one needs to just create an instance of the form class created above in forms.py.
Now let’s edit templates > home.html
<form action = "" method = "post">{% csrf_token %}{{form }}<input type="submit" value=Submit"></form> |
Now, visit http://localhost:8000/
.
To check how to use the data rendered by Django Forms visit Render Django Form Fields
Create Django Form from Models
Django ModelForm is a class that is used to directly convert a model into a Django form. If you’re building a database-driven app, chances are you’ll have forms that map closely to Django models. Now when we have our project ready, create a model in geeks/models.py,
# import the standard Django Model# from built-in libraryfrom django.db import models# declare a new model with a name "GeeksModel"class GeeksModel(models.Model):# fields of the modeltitle = models.CharField(max_length = 200)description = models.TextField()last_modified = models.DateTimeField(auto_now_add = True)img = models.ImageField(upload_to = "images/")# renames the instances of the model# with their title namedef __str__(self):return self.title |
To create a form directly for this model, dive into geeks/forms.py and Enter following code,
# import form class from djangofrom django import forms# import GeeksModel from models.pyfrom .models import GeeksModel# create a ModelFormclass GeeksForm(forms.ModelForm):# specify the name of model to useclass Meta:model = GeeksModelfields = "__all__" |
Now visit http://127.0.0.1:8000/,
More on Django Forms
- Render HTML Forms (GET & POST) in Django
- {{ form.as_p }} – Render Django Forms as paragraph
- {{ form.as_table }} – Render Django Forms as table
- {{ form.as_ul }} – Render Django Forms as list
- Django form field custom widgets
- Python | Form validation using django
- Django ModelForm – Create form from Models
- Render Django Form Fields Manually
- Django Formsets
- Django ModelFormSets
Basic form data types and fields list
The most important part of a form and the only required part is the list of fields it defines. Fields are specified by class attributes. Here is a list of all Form Field types used in Django.
| Name | Class | HTML Input |
|---|---|---|
| BooleanField | class BooleanField(**kwargs) | CheckboxInput |
| CharField | class CharField(**kwargs) | TextInput |
| ChoiceField | class ChoiceField(**kwargs) | Select |
| TypedChoiceField | class TypedChoiceField(**kwargs) | Select |
| DateField | class DateField(**kwargs) | DateInput |
| DateTimeField | class DateTimeField(**kwargs) | DateTimeInput |
| DecimalField | class DecimalField(**kwargs) | NumberInput when Field.localize is False, else TextInput |
| DurationField | class DurationField(**kwargs) | TextInput |
| EmailField | class EmailField(**kwargs | EmailInput |
| FileField | class FileField(**kwargs) | ClearableFileInput |
| FilePathField | class FilePathField(**kwargs) | Select |
| FloatField | class FloatField(**kwargs) | NumberInput when Field.localize is False, else TextInput |
| ImageField | class ImageField(**kwargs) | ClearableFileInput |
| IntegerField | class IntegerField(**kwargs) | NumberInput when Field.localize is False, else TextInput |
| GenericIPAddressField | class GenericIPAddressField(**kwargs) | TextInput |
| MultipleChoiceField | class MultipleChoiceField(**kwargs) | SelectMultiple |
| TypedMultipleChoiceField | class TypedMultipleChoiceField(**kwargs) | SelectMultiple |
| NullBooleanField | class NullBooleanField(**kwargs) | NullBooleanSelect |
| RegexField | class RegexField(**kwargs) | TextInput |
| SlugField | class SlugField(**kwargs) | TextInput |
| TimeField | class TimeField(**kwargs) | TimeInput |
| URLField | class URLField(**kwargs) | URLInput |
| UUIDField | class UUIDField(**kwargs) | TextInput |
Core Field Arguments
Core Field arguments are the arguments given to each field for applying some constraint or imparting a particular characteristic to a particular Field. For example, adding an argument required = False to CharField will enable it to be left blank by the user. Each Field class constructor takes at least these arguments. Some Field classes take additional, field-specific arguments, but the following should always be accepted:
| Field Options | Description |
|---|---|
| required | By default, each Field class assumes the value is required, so to make it not required you need to set required=False |
| label | The label argument lets you specify the “human-friendly” label for this field. This is used when the Field is displayed in a Form. |
| label_suffix | The label_suffix argument lets you override the form’s label_suffix on a per-field basis. |
| widget | The widget argument lets you specify a Widget class to use when rendering this Field. See Widgets for more information. |
| help_text | The help_text argument lets you specify descriptive text for this Field. If you provide help_text, it will be displayed next to the Field when the Field is rendered by one of the convenience Form methods. |
| error_messages | The error_messages argument lets you override the default messages that the field will raise. Pass in a dictionary with keys matching the error messages you want to override. |
| validators | The validators argument lets you provide a list of validation functions for this field. |
| localize | The localize argument enables the localization of form data input, as well as the rendered output. |
| disabled. | The disabled boolean argument, when set to True, disables a form field using the disabled HTML attribute so that it won’t be editable by users. |
Attention geek! Strengthen your foundations with the Python Programming Foundation Course and learn the basics.
To begin with, your interview preparations Enhance your Data Structures concepts with the Python DS Course. And to begin with your Machine Learning Journey, join the Machine Learning – Basic Level Course
After creating a Django Form, if one requires some or all fields of the form be filled with some initial data, one can use functionality of Django forms to do so. It is not the same as a placeholder, but this data will be passed into the view when submitted. There are multiple methods to do this, most common being to pass the data dictionary when we initialize the form in Django view. Other methods include passing initial values through form fields or overriding the __init__ method.
How to pass initial data to a Django form ?
Illustration of passing initial data using an Example. Consider a project named geeksforgeeks having an app named geeks.
Refer to the following articles to check how to create a project and an app in Django.
Now let’s create a demo form in “geeks/forms.py”,
from django import forms // creating a django formclass GeeksForm(forms.Form): title = forms.CharField() description = forms.CharField() available = forms.BooleanField() email = forms.EmailField() |
Now to render this form we need to create the view and template which will be used to display the form to user. In geeks/views.py, create a view
from django.shortcuts import renderfrom .forms import GeeksForm # creating a home viewdef home_view(request): context = {} form = GeeksForm(request.POST or None) context['form'] = form return render(request, "home.html", context) |
and in templates/home.html,
<form method="POST"> {% csrf_token %} {{ form.as_p }} <input type="submit" value="Submit"></form> |
Now let’s display the form by running
Python manage.py runserver
visit http://127.0.0.1:8000/
Method 1 – Adding initial form data in views.py
This first and most commonly used method to add initial data through a dictionary is in view.py during the initialization of a form. Here is the code of views.py with some added data.
from django.shortcuts import renderfrom .forms import GeeksForm def home_view(request): context ={} # dictionary for initial data with # field names as keys initial_dict = { "title" : "My New Title", "description" : " A New Description", "available":True, "email":"abc@gmail.com" } # add the dictionary during initialization form = GeeksForm(request.POST or None, initial = initial_dict) context['form']= form return render(request, "home.html", context) |
Now open http://127.0.0.1:8000/. This method is senior of all and will override any data provided during other methods.
Method 2 – Adding initial form data using fields in forms.py
One can add initial data using fields in forms.py. An attribute initial is there for this purpose.
In forms.py,
from django import forms class GeeksForm(forms.Form): # adding initial data using initial attribute title = forms.CharField(initial = "Method 2 ") description = forms.CharField(initial = "Method 2 description") available = forms.BooleanField(initial = True) email = forms.EmailField(initial = "abc@gmail.com") |
Now visit, http://127.0.0.1:8000/. One can see the data being updated to method 2.
This way one can add initial data to a form in order to ease the work by a user or any related purpose. This data will be passed to models or views as defined by user and would act as normal data entered by user in the form.
###############Ecample
Forms.py
from django import forms
from analyzer.models import Users
from django.forms import ValidationError
class RtiForm(forms.Form):
rti_no = forms.IntegerField()
rti_label = forms.CharField(max_length = 100)
rti_lrg = forms.CharField(max_length = 100)
rti_dif = forms.CharField(max_length = 100)
rti_symptom = forms.CharField(max_length = 100)
# import GeeksModel from models.py
from .models import RTI
# create a ModelForm
class RTIForm(forms.ModelForm):
# specify the name of model to use
class Meta:
model = RTI
fields = "__all__"
models.py
class RTI(models.Model):
rti_no = models.IntegerField(null=True)
rti_label = models.CharField(max_length = 50)
rti_lrg = models.CharField(max_length = 50)
rti_dif = models.CharField(max_length = 50)
rti_symptom = models.CharField(max_length = 50)
#New_difs=models.ForeignKey('New_difs',on_delete=models.CASCADE )
# student = models.ForeignKey('Student', default = 1, null=True, on_delete=models.CASCADE )
def __str__(self): # What to be displayed when Dreamreal.objects.all() is called
return "RTI no:"+str(self.rti_no)+" LRG Name:"+self.rti_lrg+" DIF name:"+self.rti_dif+" SYMPTOM:"+self.rti_symptom
# class Meta:
# db_table = "trainer"
HTML
<form method="POST" enctype="multipart/form-data">
<!-- Security token -->
{% csrf_token %}
<!-- Using the formset -->
{{ form.as_ul }}
{{ form.as_p }}
{{ form.as_table }}
<input type="submit" value="Submit">
</form>
views.py
path('add/', views.rti_add,name='add' ),
######################SENT DEX########################## ############################################################
we're going to work on handling user accounts, which includes registering, logging in, and logging out. Along with this, we're also going to dynamically change the navigation bar to reflect if a user is logged in or not.
To begin, we need some way to create users. We can actually manually create users now in our Admin page, but of course we probably don't want to do that for every user on our website. Django already has a User model, which you may find is enough for you, or you can extend it later. Checking it out:
$ python3 manage.py shell
Python 3.7.2 (v3.7.2:9a3ffc0492, Dec 24 2018, 02:44:43)
[Clang 6.0 (clang-600.0.57)] on darwin
Type "help", "copyright", "credits" or "license" for more information.
(InteractiveConsole)
>>> from django.contrib.auth.models import User
>>> dir(User)
['DoesNotExist', 'EMAIL_FIELD', 'Meta', 'MultipleObjectsReturned', 'REQUIRED_FIELDS', 'USERNAME_FIELD', '__class__', '__delattr__', '__dict__', '__dir__', '__doc__', '__eq__', '__format__', '__ge__', '__getattribute__', '__getstate__', '__gt__', '__hash__', '__init__', '__init_subclass__', '__le__', '__lt__', '__module__', '__ne__', '__new__', '__reduce__', '__reduce_ex__', '__repr__', '__setattr__', '__setstate__', '__sizeof__', '__str__', '__subclasshook__', '__weakref__', '_check_column_name_clashes', '_check_field_name_clashes', '_check_fields', '_check_id_field', '_check_index_together', '_check_indexes', '_check_local_fields', '_check_long_column_names', '_check_m2m_through_same_relationship', '_check_managers', '_check_model', '_check_model_name_db_lookup_clashes', '_check_ordering', '_check_property_name_related_field_accessor_clashes', '_check_single_primary_key', '_check_swappable', '_check_unique_together', '_do_insert', '_do_update', '_get_FIELD_display', '_get_next_or_previous_by_FIELD', '_get_next_or_previous_in_order', '_get_pk_val', '_get_unique_checks', '_meta', '_password', '_perform_date_checks', '_perform_unique_checks', '_save_parents', '_save_table', '_set_pk_val', 'check', 'check_password', 'clean', 'clean_fields', 'date_error_message', 'date_joined', 'delete', 'email', 'email_user', 'first_name', 'from_db', 'full_clean', 'get_all_permissions', 'get_deferred_fields', 'get_email_field_name', 'get_full_name', 'get_group_permissions', 'get_next_by_date_joined', 'get_previous_by_date_joined', 'get_session_auth_hash', 'get_short_name', 'get_username', 'groups', 'has_module_perms', 'has_perm', 'has_perms', 'has_usable_password', 'id', 'is_active', 'is_anonymous', 'is_authenticated', 'is_staff', 'is_superuser', 'last_login', 'last_name', 'logentry_set', 'natural_key', 'normalize_username', 'objects', 'password', 'pk', 'prepare_database_save', 'refresh_from_db', 'save', 'save_base', 'serializable_value', 'set_password', 'set_unusable_password', 'unique_error_message', 'user_permissions', 'username', 'username_validator', 'validate_unique']
>>>
Noting some of those attributes, we can see there are fields for username, email, names...etc.
So let's go into main's templates, and copy the home.html file and call the copy register.html, modifying it to be:
{% extends 'main/header.html' %}

{% block content %}

    <form method="POST">
        {% csrf_token %}
        {{form}}
    </form>

    If you already have an account <a href="/login" target="blank"><strong>login</strong></a> instead.

{% endblock %}
Alright, some basics here, the form tag just denotes that there will be a form, and the method means this will create a POST request (meaning data will be submitted), as opposed to a GET request where the hope is to get some data in return.
Next, we have
{% csrf_token %}
This is a special token aimed at combatting something called Cross Site Request Forgery, which you can learn more about here: Cross-Site Request Forgery (CSRF).
Next, we just have a simple form variable, which you should be able to guess is going to be passed as context into this template. Finally, we just have a bit of text in case the user miss-clicked to signup, and just needs to go to login instead.
Let's head to mysite/main/views.py
We will call this function register. While we could build this form, we can also import the user creation form:
from django.contrib.auth.forms import UserCreationForm
Then build the register function:
def register(request):
    form = UserCreationForm
    return render(request = request,
                  template_name = "main/register.html",
                  context={"form":form})
Okay, the template is done, the view is done. That's the model and the view boxes checked. All that's left is the controller! Head to mysite/main/urls.py and let's add that now!
We just need to add the path:
path("/register", views.register, name="register"),
Full file:
from django.urls import path
from . import views


app_name = 'main'  # here for namespacing of urls.

urlpatterns = [
  path("", views.homepage, name="homepage"),
  path("register/", views.register, name="register"),
]
Are we done? I think we're done! Let's click on register in the navbar!
Okay, we're off to a decent start. I wish the form was not right up to the left edge like that though. Let's fix that by putting the body content in a container div.
mysite/main/templates/main/header.html... <div class="container"> {% block content %} {% endblock %} </div> ...
Then maybe a break or two in the register.html
{% extends 'main/header.html' %}

{% block content %}
    <br>
    <form method="POST">
        {% csrf_token %}
        {{form}}
    </form>

    If you already have an account <a href="/login" target="blank"><strong>login</strong></a> instead.

{% endblock %}
Great, but the form doesn't actually do anything, so let's change that next!
Inside our form tags, let's add a submit button:
<button style="background-color:#F4EB16; color:blue" class="btn btn-outline-info" type="submit">Sign Up</button>
So now our full mysite/main/templates/main/register page is:
{% extends 'main/header.html' %}

{% block content %}

    <div class="container">
        <form method="POST">
            {% csrf_token %}
            {{form.as_p}}

            <button style="background-color:#F4EB16; color:blue" class="btn btn-outline-info" type="submit">Sign Up</button>

        </form>

        If you already have an account <a href="/login" target="blank"><strong>login</strong></a> instead.
    </div>
{% endblock %}
Next, forms have various attributes that we can use:
as_p- paragraph tagsas_table- as a tableas_ul- as an unordered list
You might not have noticed, but our form is a little confusing at the first passowrd, it's hard to tell what goes there at a quick glance. let's instead set our form as_p to remedy this. Full page:
{% extends 'main/header.html' %}

{% block content %}
    <br>
    <form method="POST">
        {% csrf_token %}
        {{form.as_p}}
        <button style="background-color:#F4EB16; color:blue" class="btn btn-outline-info" type="submit">Sign Up</button>
    </form>

    If you already have an account <a href="/login" target="blank"><strong>login</strong></a> instead.

{% endblock %}
Now that our form has a submit button, we can fill out the form, try to sign up... but nothing happens? Well, right now our registration page has no handling for when there's a POST request, so it's actually just reloading the registration page. Where might we need to edit in order to handle for this type of request?
We can handle for specific requests and other types of logic from within our views.py, under the register function that we've started.
The very first thing we should do is check to see if the request made to this page has been a POST:
if request.method == "POST":
If it has, then we're going to map the submitted form to the UserCreationForm:
form = UserCreationForm(request.POST)
If the form is valid, then we just save this new User object (which is part of the form, so we save the form)
user = form.save()
This will save the user, but, in general, it's nice if the user just registered to also log them in so they don't need to re-type things again. To do this, we can just use Django's login function which we can grab from django.contrib.auth, which also gives use logout, and authenticate...all of which we'll need, so let's grab all three with:
from django.contrib.auth import logout, authenticate, login
So now we can log in the user with:
            username = form.cleaned_data.get('username')
            login(request, user)
Now we just want to send the user to the homepage. While we could just...render...the homepage now, we also need to change the URL, and, since we're actually sending them to the homepage, we want to redirect them there now. Add redirect to your imports from django.shortcuts:
from django.shortcuts import render, redirect
So now we can just do:
return redirect("main:homepage")
This will look in urls.py for the app_name called main (recall we did this with: app_name = 'main' ), then it finds the url with the name of "homepage." So now our full register function is:
def register(request):
  if request.method == "POST":
        form = UserCreationForm(request.POST)
        if form.is_valid():
            user = form.save()
            username = form.cleaned_data.get('username')
            login(request, user)
            return redirect("main:homepage")

    form = UserCreationForm
    return render(request = request,
                  template_name = "main/register.html",
                  context={"form":form})
In some cases, the form wont be valid for whatever reason, however, so we also need to handle for that:
def register(request):
    if request.method == "POST":
        form = UserCreationForm(request.POST)
        if form.is_valid():
            user = form.save()
            username = form.cleaned_data.get('username')
            login(request, user)
            return redirect("main:homepage")

        else:
            for msg in form.error_messages:
                print(form.error_messages[msg])

            return render(request = request,
                          template_name = "main/register.html",
                          context={"form":form})

    form = UserCreationForm
    return render(request = request,
                  template_name = "main/register.html",
                  context={"form":form})
Now, we can register another user, then they're sent back to the homepage!
Full views.py just in case you're missing something:
from django.shortcuts import render, redirect
from .models import Tutorial
from django.contrib.auth.forms import UserCreationForm, AuthenticationForm
from django.contrib.auth import logout, authenticate, login


# Create your views here.
def homepage(request):
    return render(request = request,
                  template_name='main/home.html',
                  context = {"tutorials":Tutorial.objects.all})

def register(request):
    if request.method == "POST":
        form = UserCreationForm(request.POST)
        if form.is_valid():
            user = form.save()
            username = form.cleaned_data.get('username')
            login(request, user)
            return redirect("main:homepage")

        else:
            for msg in form.error_messages:
                print(form.error_messages[msg])

            return render(request = request,
                          template_name = "main/register.html",
                          context={"form":form})

    form = UserCreationForm
    return render(request = request,
                  template_name = "main/register.html",
                  context={"form":form})
So now we've found ourselves at a point where we need something more than a print statement for information. There's nothing to inform the user once they've logged in, and there's nothing to tell us that we've done something wrong if we have. This is where messaging comes in, which is what we'll be talking about in the next tutorial, along with some other changes for the user on login.
DateField
- class
DateField(**kwargs) -
- Default widget:
DateInput - Empty value:
None - Normalizes to: A Python
datetime.dateobject. - Validates that the given value is either a
datetime.date,datetime.datetimeor string formatted in a particular date format. - Error message keys:
required,invalid
Takes one optional argument:
input_formats- A list of formats used to attempt to convert a string to a valid
datetime.dateobject.
If no
input_formatsargument is provided, the default input formats are taken fromDATE_INPUT_FORMATSifUSE_L10NisFalse, or from the active locale formatDATE_INPUT_FORMATSkey if localization is enabled. See also format localization. - Default widget:
EmailField
- class
EmailField(**kwargs) -
- Default widget:
EmailInput - Empty value: Whatever you’ve given as
empty_value. - Normalizes to: A string.
- Uses
EmailValidatorto validate that the given value is a valid email address, using a moderately complex regular expression. - Error message keys:
required,invalid
Has three optional arguments
max_length,min_length, andempty_valuewhich work just as they do forCharField. - Default widget:
FileField
- class
FileField(**kwargs) -
- Default widget:
ClearableFileInput - Empty value:
None - Normalizes to: An
UploadedFileobject that wraps the file content and file name into a single object. - Can validate that non-empty file data has been bound to the form.
- Error message keys:
required,invalid,missing,empty,max_length
Has two optional arguments for validation,
max_lengthandallow_empty_file. If provided, these ensure that the file name is at most the given length, and that validation will succeed even if the file content is empty.To learn more about the
UploadedFileobject, see the file uploads documentation.When you use a
FileFieldin a form, you must also remember to bind the file data to the form.The
max_lengtherror refers to the length of the filename. In the error message for that key,%(max)dwill be replaced with the maximum filename length and%(length)dwill be replaced with the current filename length. - Default widget:
FilePathField
- class
FilePathField(**kwargs) -
- Default widget:
Select - Empty value:
''(an empty string) - Normalizes to: A string.
- Validates that the selected choice exists in the list of choices.
- Error message keys:
required,invalid_choice
The field allows choosing from files inside a certain directory. It takes five extra arguments; only
pathis required:path- The absolute path to the directory whose contents you want listed. This directory must exist.
recursive- If
False(the default) only the direct contents ofpathwill be offered as choices. IfTrue, the directory will be descended into recursively and all descendants will be listed as choices.
match- A regular expression pattern; only files with names matching this expression will be allowed as choices.
allow_files- Optional. Either
TrueorFalse. Default isTrue. Specifies whether files in the specified location should be included. Either this orallow_foldersmust beTrue.
allow_folders- Optional. Either
TrueorFalse. Default isFalse. Specifies whether folders in the specified location should be included. Either this orallow_filesmust beTrue.
- Default widget:
ImageField
- class
ImageField(**kwargs)¶ -
- Default widget:
ClearableFileInput - Empty value:
None - Normalizes to: An
UploadedFileobject that wraps the file content and file name into a single object. - Validates that file data has been bound to the form. Also uses
FileExtensionValidatorto validate that the file extension is supported by Pillow. - Error message keys:
required,invalid,missing,empty,invalid_image
Using an
ImageFieldrequires that Pillow is installed with support for the image formats you use. If you encounter acorrupt imageerror when you upload an image, it usually means that Pillow doesn’t understand its format. To fix this, install the appropriate library and reinstall Pillow.When you use an
ImageFieldon a form, you must also remember to bind the file data to the form.After the field has been cleaned and validated, the
UploadedFileobject will have an additionalimageattribute containing the Pillow Image instance used to check if the file was a valid image. Pillow closes the underlying file descriptor after verifying an image, so whilst non-image data attributes, such asformat,height, andwidth, are available, methods that access the underlying image data, such asgetdata()orgetpixel(), cannot be used without reopening the file. For example:>>> from PIL import Image >>> from django import forms >>> from django.core.files.uploadedfile import SimpleUploadedFile >>> class ImageForm(forms.Form): ... img = forms.ImageField() >>> file_data = {'img': SimpleUploadedFile('test.png', <file data>)} >>> form = ImageForm({}, file_data) # Pillow closes the underlying file descriptor. >>> form.is_valid() True >>> image_field = form.cleaned_data['img'] >>> image_field.image <PIL.PngImagePlugin.PngImageFile image mode=RGBA size=191x287 at 0x7F5985045C18> >>> image_field.image.width 191 >>> image_field.image.height 287 >>> image_field.image.format 'PNG' >>> image_field.image.getdata() # Raises AttributeError: 'NoneType' object has no attribute 'seek'. >>> image = Image.open(image_field) >>> image.getdata() <ImagingCore object at 0x7f5984f874b0>
Additionally,
UploadedFile.content_typewill be updated with the image’s content type if Pillow can determine it, otherwise it will be set toNone. - Default widget:
#####################SENT DEX#####################
LOGIN LOGOUT
#############################
Welcome to part 8 of the web development with Python and Django tutorial series. Here, we're going to continue working on our user handling and we will be bringing in the ability for a user to login and log out.
Let's start with logout, since that's super easy. We don't need to design anything for it and Django already has a logout function!
Okay, let's start with the URL, it should be /logout, so let's head into main/mysite/urls.py and add a path for that:
from django.urls import path
from . import views


app_name = 'main'  # here for namespacing of urls.

urlpatterns = [
    path("", views.homepage, name="homepage"),
    path("register/", views.register, name="register"),
    path("logout", views.logout_request, name="logout"),
]
Now that we have the URL for it, let's create the view, which we've already decided will be a function called logout_request
Here's a great example of where you might decide to call your function "logout"...but we're trying to use logout from Django. We'd definitely like to not make that mistake, so make sure to not call it the same as the function we're going to be trying to use. Same thing when we go to make our login function...we'll have to call it something other than that!
mysite/main/views.py
...
  def logout_request(request):
    logout(request)
    messages.info(request, "Logged out successfully!")
    return redirect("main:homepage")
  ...
Now, refresh our website, and click logout. Works!
Okay, now seems like a good time to do the login page. To begin, let's start in views.py since we're already here anyway. We'll start with:
from django.contrib.auth.forms import UserCreationForm, AuthenticationForm

...

def login_request(request):
    form = AuthenticationForm()
    return render(request = request,
                  template_name = "main/login.html",
                  context={"form":form})
Next, let's work on the html page: mysite/main/templates/main/login.html
{% extends 'main/header.html' %}

{% block content %}

    <div class="container">
        <form method="POST">
        {% csrf_token %}
        {{form.as_p}}
            <button style="background-color:#F4EB16; color:blue" class="btn btn-outline-info" type="submit">Login</button>
        </form>
        Don't have an account? <a href="/register" target="blank"><strong>register here</strong></a>!
    </div>
{% endblock %}
Finally, we just need to add a link in urls.py:
path("login", views.login_request, name="login"),
Okay, now if we go to http://127.0.0.1:8000/login, we can see a login page. Awesome, except that, just like our registration page, nothing will happen unless we handle for the POST request, which is where the meat of this page will actually be:
mysite/main/views.py
def login_request(request):
    if request.method == 'POST':
        form = AuthenticationForm(request=request, data=request.POST)
        if form.is_valid():
            username = form.cleaned_data.get('username')
            password = form.cleaned_data.get('password')
            user = authenticate(username=username, password=password)
            if user is not None:
                login(request, user)
                messages.info(request, f"You are now logged in as {username}")
                return redirect('/')
            else:
                messages.error(request, "Invalid username or password.")
        else:
            messages.error(request, "Invalid username or password.")
    form = AuthenticationForm()
    return render(request = request,
                    template_name = "main/login.html",
                    context={"form":form})
With that, go ahead and try the login functionality and you should find that you're all set.
Finally, let's change one last thing about our user registration. At the moment, we're not collecting the user's email, which could turn out to be fairly problematic later for things like forgotten passwords. How can we change this? We could either completely build our own form, or we could just modify the Django one a bit. I am going to opt to just extend the Django form. To do this, create a new file: mysite/main/forms.py:
forms.py
from django import forms
from django.contrib.auth.forms import UserCreationForm
from django.contrib.auth.models import User

class NewUserForm(UserCreationForm):
    email = forms.EmailField(required=True)

    class Meta:
        model = User
        fields = ("username", "email", "password1", "password2")

    def save(self, commit=True):
        user = super(NewUserForm, self).save(commit=False)
        user.email = self.cleaned_data["email"]
        if commit:
            user.save()
        return user
Then, inside of our views.py, we instead need to import our NewUserForm
views.py
from .forms import NewUserForm
Then replace the two instances of UserCreationForm with NewUserForm in the register function. Now make sure you're logged out and register a new user. This time, there will be a password field.
We didn't need to update any models because we're using the Django User model, which already had an email field.
Next, if we were to actually add full-length tutorials, we'd be in some trouble, because our home page would be quickly filled up. We'll be talking about how to handle for this by using foreign keys to point to tutorial series and categories.
###################################################
Form and field validation
Form validation happens when the data is cleaned. If you want to customize this process, there are various places to make changes, each one serving a different purpose. Three types of cleaning methods are run during form processing. These are normally executed when you call the is_valid() method on a form. There are other things that can also trigger cleaning and validation (accessing the errors attribute or calling full_clean() directly), but normally they won’t be needed.
In general, any cleaning method can raise ValidationError if there is a problem with the data it is processing, passing the relevant information to the ValidationError constructor. See below for the best practice in raising ValidationError. If no ValidationError is raised, the method should return the cleaned (normalized) data as a Python object.
Most validation can be done using validators - helpers that can be reused. Validators are functions (or callables) that take a single argument and raise ValidationError on invalid input. Validators are run after the field’s to_python and validate methods have been called.
Validation of a form is split into several steps, which can be customized or overridden:
-
The
to_python()method on aFieldis the first step in every validation. It coerces the value to a correct datatype and raisesValidationErrorif that is not possible. This method accepts the raw value from the widget and returns the converted value. For example, aFloatFieldwill turn the data into a Pythonfloator raise aValidationError. -
The
validate()method on aFieldhandles field-specific validation that is not suitable for a validator. It takes a value that has been coerced to a correct datatype and raisesValidationErroron any error. This method does not return anything and shouldn’t alter the value. You should override it to handle validation logic that you can’t or don’t want to put in a validator. -
The
run_validators()method on aFieldruns all of the field’s validators and aggregates all the errors into a singleValidationError. You shouldn’t need to override this method. -
The
clean()method on aFieldsubclass is responsible for runningto_python(),validate(), andrun_validators()in the correct order and propagating their errors. If, at any time, any of the methods raiseValidationError, the validation stops and that error is raised. This method returns the clean data, which is then inserted into thecleaned_datadictionary of the form. -
The
clean_<fieldname>()method is called on a form subclass – where<fieldname>is replaced with the name of the form field attribute. This method does any cleaning that is specific to that particular attribute, unrelated to the type of field that it is. This method is not passed any parameters. You will need to look up the value of the field inself.cleaned_dataand remember that it will be a Python object at this point, not the original string submitted in the form (it will be incleaned_databecause the general fieldclean()method, above, has already cleaned the data once).For example, if you wanted to validate that the contents of a
CharFieldcalledserialnumberwas unique,clean_serialnumber()would be the right place to do this. You don’t need a specific field (it’s aCharField), but you want a formfield-specific piece of validation and, possibly, cleaning/normalizing the data.The return value of this method replaces the existing value in
cleaned_data, so it must be the field’s value fromcleaned_data(even if this method didn’t change it) or a new cleaned value. -
The form subclass’s
clean()method can perform validation that requires access to multiple form fields. This is where you might put in checks such as “if fieldAis supplied, fieldBmust contain a valid email address”. This method can return a completely different dictionary if it wishes, which will be used as thecleaned_data.Since the field validation methods have been run by the time
clean()is called, you also have access to the form’serrorsattribute which contains all the errors raised by cleaning of individual fields.Note that any errors raised by your
Form.clean()override will not be associated with any field in particular. They go into a special “field” (called__all__), which you can access via thenon_field_errors()method if you need to. If you want to attach errors to a specific field in the form, you need to calladd_error().Also note that there are special considerations when overriding the
clean()method of aModelFormsubclass. (see the ModelForm documentation for more information)
These methods are run in the order given above, one field at a time. That is, for each field in the form (in the order they are declared in the form definition), the Field.clean() method (or its override) is run, then clean_<fieldname>(). Finally, once those two methods are run for every field, the Form.clean() method, or its override, is executed whether or not the previous methods have raised errors.
Examples of each of these methods are provided below.
As mentioned, any of these methods can raise a ValidationError. For any field, if the Field.clean() method raises a ValidationError, any field-specific cleaning method is not called. However, the cleaning methods for all remaining fields are still executed.
>>> from django import forms
>>> f=forms.EmailField()
>>> f.clean('foo@example.com')
'foo@example.com'
>>> f.clean('foo@example')
Traceback (most recent call last):
File "<stdin>", line 1, in <module>
File "/Library/Frameworks/Python.framework/Versions/3.8/lib/python3.8/site-packages/django/forms/fields.py", line 151, in clean
self.run_validators(value)
File "/Library/Frameworks/Python.framework/Versions/3.8/lib/python3.8/site-packages/django/forms/fields.py", line 142, in run_validators
raise ValidationError(errors)
django.core.exceptions.ValidationError: <exception str() failed>
>>> f = forms.CharField()
>>> f.clean('foo')
'foo'
>>> f.clean('')
Traceback (most recent call last):
File "<stdin>", line 1, in <module>
File "/Library/Frameworks/Python.framework/Versions/3.8/lib/python3.8/site-packages/django/forms/fields.py", line 150, in clean
self.validate(value)
File "/Library/Frameworks/Python.framework/Versions/3.8/lib/python3.8/site-packages/django/forms/fields.py", line 128, in validate
raise ValidationError(self.error_messages['required'], code='required')
django.core.exceptions.ValidationError: <exception str() failed>
>>> f.clean(' ')
Traceback (most recent call last):
File "<stdin>", line 1, in <module>
File "/Library/Frameworks/Python.framework/Versions/3.8/lib/python3.8/site-packages/django/forms/fields.py", line 150, in clean
self.validate(value)
File "/Library/Frameworks/Python.framework/Versions/3.8/lib/python3.8/site-packages/django/forms/fields.py", line 128, in validate
raise ValidationError(self.error_messages['required'], code='required')
django.core.exceptions.ValidationError: <exception str() failed>
>>> f.clean('0')
'0'
>>> f.clean('True')
'True'
>>> f.clean(True)
'True'
>>
+++++============
myapp/urls.py
from django.contrib import admin
from django.urls import path,re_path
from . import views
from django.views.generic import TemplateView
urlpatterns = [
#'myapp.views',
#path('admin/', admin.site.urls),
path('', views.hello,name='hello1'),
re_path('display(\d+)', views.hello2,name='id'),
path('crud', views.crudops,name='crud'),
re_path('temp(\d+)', views.hello3,name='id'),
path(r'connection/',TemplateView.as_view(template_name = 'login.html')),
path(r'^login/', views.login, name = 'login'),
]
#################myapp/views.py#####
def login(request):
username = "not logged in"
# request.method: type of HTML action , GET or PUT or POST etc
if request.method == "POST":
#Get the posted form
# request.POST : gets the data from html page
print("Get data from HTML")
MyLoginForm = LoginForm(request.POST)
username = MyLoginForm.data.get('username')
#Debugging
#print( MyLoginForm.errors)
print("Login user:",username, " ",MyLoginForm.is_valid())
# MyLoginForm.clean_message()
if MyLoginForm.is_valid():
username = MyLoginForm.cleaned_data['username']
print("Login user:",username)
else:
print("Validation failed")
username="Invalid user name or not registered"
else:
print(" no POST")
MyLoginForm = Loginform()
return render(request, 'loggedin.html', {"username" : username})
myapp/forms.py
from django import forms
from myapp.models import Dreamreal
class LoginForm(forms.Form):
username = forms.CharField(max_length = 100)
password = forms.CharField(widget = forms.PasswordInput())
def clean_username(self): # clean_<field name>
username = self.cleaned_data.get("username")
print("user ravi:",username)
dbuser = Dreamreal.objects.filter(name = username)
if(dbuser):
print("Valid user name")
else:
print("not valid anme")
if dbuser:
print("Valid user")
else:
raise ValidationError("User does not exist in our db!")
return username
myapp/templates/login.html
<html>
<body>
<form name = "form" action = {% url "login" %}
method = "POST" >{% csrf_token %}
<div style = "max-width:470px;">
<center>
<input type = "text" style = "margin-left:20%;"
placeholder = "Identifiant" name = "username" />
</center>
</div>
<br>
<div style = "max-width:470px;">
<center>
<input type = "password" style = "margin-left:20%;"
placeholder = "password" name = "password" />
</center>
</div>
<br>
<div style = "max-width:470px;">
<center>
<button style = "border:0px; background-color:#4285F4; margin-top:8%;
height:35px; width:80%;margin-left:19%;" type = "submit"
value = "Login" >
<strong>Login</strong>
</button>
</center>
</div>
</form>
</body>
</html>
myapp/templates/loggedin.html
<html>
<body>
You are : <strong>{{username}}</strong>
</body>
</html>
################################
- Create myapp/forms.py
from django import forms
class LoginForm(forms.Form):
username = forms.CharField(max_length = 100)
password = forms.CharField(widget = forms.PasswordInput())
def clean_message(self):
username = self.cleaned_data.get("username")
#dbuser = Dreamreal.objects.filter(name = username)
#if not dbuser:
# raise forms.ValidationError("User does not exist in our db!")
return username
2. add new method in myapp/views.py
##############FORM Example#################
Add
from myapp.forms import LoginForm
def login(request):
username = "not logged in"
# If Http method is POST
if request.method == "POST":
#Get the posted form
# Create loginForm object with the data submitted by the user to the server
MyLoginForm = LoginForm(request.POST)
# Validate the received data
if MyLoginForm.is_valid():
# Extract the data from the form object
username = MyLoginForm.cleaned_data['username']
else:
MyLoginForm = LoginForm()
# Pass the extracted user name to the HTML page
return render(request, 'loggedin.html', {"username" : username})
3. Create myapp/templates directory
4. add login.html
<html>
<body>
<form name = "form" action = "{% url "login" %}"
method = "POST" >{% csrf_token %}
<div style = "max-width:470px;">
<center>
<input type = "text" style = "margin-left:20%;"
placeholder = "Identifiant" name = "username" />
</center>
</div>
<br>
<div style = "max-width:470px;">
<center>
<input type = "password" style = "margin-left:20%;"
placeholder = "password" name = "password" />
</center>
</div>
<br>
<div style = "max-width:470px;">
<center>
<button style = "border:0px; background-color:#4285F4; margin-top:8%;
height:35px; width:80%;margin-left:19%;" type = "submit"
value = "Login" >
<strong>Login</strong>
</button>
</center>
</div>
</form>
</body>
</html>
5. create loggedin.html
<html>

   <body>
      You are : <strong>{{username}}</strong>
   </body>

</html>

6. add myapp/urls.py

# path('connection/',views.login,name='login'),
or
 re_path(r'^connection/',TemplateView.as_view(template_name = 'login.html')),
re_path(r'^login/', views.login, name = 'login')
# This connection url name will be used in login.html to forward the data to this url
# The above name=login is referred by url action in form loggin.html
7.http://127.0.0.1:8000/myapp/connection/


########################## Read and  Save student data########################

 1. myapp/models.py
from django.db import models
# Create your models here.
class Trainer(models.Model):
name = models.CharField(max_length = 20)
mail = models.CharField(max_length = 50)
course = models.CharField(max_length = 50)
ph = models.IntegerField()
student = models.ForeignKey('Student', default = 1, null=True, on_delete=models.CASCADE )
def __str__(self): # What to be displayed when Dreamreal.objects.all() is called
return self.name
class Meta:
db_table = "trainer"
class Student(models.Model):
stdnt_name = models.CharField(max_length = 20)
stdnt_mail= models.CharField(max_length = 50)
stdnt_course = models.CharField(max_length = 50)
stdnt_ph = models.IntegerField()
def __str__(self): # What to be displayed when Dreamreal.objects.all() is called
s="name:"+self.stdnt_name+" "+"mail:"+self.stdnt_mail+" "+"Course:"+self.stdnt_course+"Ph:"+self.stdnt_ph
return s
2. myapp/views.py
# Create your views here.
def get_name(request):
context = {}
rec = RegisterForm()
context["form"]=rec
return render(request, "get.html", context)
# Create your views here.
def post(request):
context = {}
rec = RegisterForm()
context["form"]=rec
return render(request, "post.html", context)
from myapp.models import Student
def save(request):
username = "not logged in"
# If Http method is POST
if request.method == "POST":
#Get the posted form
# Create loginForm object with the data submitted by the user to the server
rec = RegisterForm(request.POST)
print(rec)
#username = MyLoginForm.data.get('username')
#print("Login user:",username, " ",MyLoginForm.is_valid())
# Validate the received data
if rec.is_valid():
# Extract the data from the form object
s=Student()
s.stdnt_name = rec.cleaned_data['name']
s.stdnt_ph = rec.cleaned_data['ph']
s.stdnt_course = rec.cleaned_data['course']
mode = rec.cleaned_data['mode']
s.stdnt_mail = rec.cleaned_data['email']
s.save()
#else:
# print("VAlidation failed")
# username="Invalid user name or not registered"
#MyLoginForm = LoginForm()
# Pass the extracted user name to the HTML page
return render(request, 'save.html', {"username" : s})
3. myapp/urls.py
from django.contrib import admin
from django.urls import path,re_path,include
from . import views
from django.views.generic import TemplateView
urlpatterns = [
path('', views.hello_myapp,name='hello_myapp' ),
re_path('display(\d+)', views.hello2,name='id'),
re_path('date(\d+)', views.hello3,name='id'),
re_path(r'^connection/',TemplateView.as_view(template_name = 'login.html')),
re_path(r'^login/', views.login, name = 'login'),
re_path("register", views.register, name="register"),
#re_path(r'^get/',TemplateView.as_view(template_name = 'contact.html')),
re_path("get_name", views.get_name, name="get_name"),
re_path("post", views.post, name="post"),
re_path("save", views.save, name="save"),
]
4. templates

cat post.html
<form method="POST" action = "{% url "save" %}" >
{% csrf_token %}
<table>
{{ form.as_table }}
</table>
<input type="submit" value="Submit">
</form>
cat save.mtml
<html>
<body> Saved record for student : <strong>{{username}}</strong>
</body>
</html>
cat get.html
<form method = "GET">
<label for="your_name">Your name: </label>
<input id="your_name" type="text" name="your_name">
<input type = "submit" value = "Submit">
</form>