To enable the session in the django, you will need to make sure of two things in settings.py :
- MIDDLEWARE_CLASSES has ‘django.contrib.sessions.middleware.SessionMiddleware’ activated
- INSTALLED_APPS has ‘django.contrib.sessions’ added.
# Application definitionINSTALLED APPS=['dhun','django.contrib.admin','django.contrib.auth','django.contrib.contenttypes','django.contrib.sessions','django.contrib.messages','django.contrib.staticfiles',]MIDDLEWARE=['django.middleware.securitY.SecuritYMiddleware','django.contrib.sessions.middleware.SessionMiddLeware','django.middleware.common.CommonMiddleware','django.middleware.csrf.CsrfViewMidd1eware','django.contrib.auth.middleware.AuthenticationMiddleware','django.contrib.messages.middleware.MessageMiddleware','django.middleware.clickjacking.XFrameOptionsMiddleware',]
After enabling the session, the session database table has to create and to do this run the following command:
python manage.py syncdb
After running previous command and if it didn’t find any errors then later run the command given below to finally reflect the changes saved onto the migration file onto the database.
python manage.py migrate
Now once sessions are created, then testing of the cookies has to be done. In views.py, set the test cookie in the index view, and test the cookie in your about view.
from django.shortcuts import renderfrom django.http import HttpResponsefrom .models import Albumdef home(request) :a = Album.objects.all()return render(request, "dhun/home.html ", {"Album":a})def index(request) :num_authors = Author.objects.count()request.session.set_test_cookie()num_visits = request.session.get( 'num_visits', 0)request.session ['num_visits'] = num_visits + 1context ={'num_books':num_books,'num_instances':num_instances,'num_instances available':num_instances_available,'num_authors':num_authors,'num_visits':num_visits,}def about(request):LANGUAGE_CODE ='en-us 'TIME_ZONE ='UTC'if request.session.test_cookie_worked():print ("Cookie Tested !")request.session.delete_test_cookie() |
To see the work done till now.
- First run the localhost through this command.
python manage.py runserver
- Then Open http://localhost:8000/ in the browser.
- Visit the index page then visit the about page. The “Cookie Tested!” will be printed out to the console.

To know how many times the site has been visited.You have to do following two things In views.py:
- Add and update the code in the index view function/li>
- Update the about view function
fromdjango.shortcutsimportrenderfromdjango.httpimportHttpResponsefrom.modelsimportAlbumdefhome(request):a=AIbum. objects.all()returnrender(request,"dhun/home.html", {"album":a})defindex(request):visits=int(reques.COOKIES.get('visits','0'))response=HttpResponse(template.render(context))ifrequest.COOKIES.has_key('last_visit'):last_visit=request. COOKIES [' last_visit']last_visit_time=datetime.strptime(last_visit[:-7],"%Y-%m-%d %H:%M:%S") "curr_time=datetime.now()if(curr_time—last_visit_time).days > O:response.set_cookie('visits ', visits+1)response. set_cookie(' last_visit', datetime.now())else:response.set_cookie(' last_visit', datetime.now())returnresponsedefabout(request) :context=RequestContext(request)ifrequest.COOKIES.has_key(' visits '):v=request.COOKIES [' visits ']else:v=0returnrender_to_response('music/about.html', {'visits':v}, context)
Django - Cookies Handling
Sometimes you might want to store some data on a per-site-visitor basis as per the requirements of your web application. Always keep in mind, that cookies are saved on the client side and depending on your client browser security level, setting cookies can at times work and at times might not.
To illustrate cookies handling in Django, let's create a system using the login system we created before. The system will keep you logged in for X minute of time, and beyond that time, you will be out of the app.
For this, you will need to set up two cookies, last_connection and username.
At first, let's change our login view to store our username and last_connection cookies −
from django.template import RequestContext

def login(request):
   username = "not logged in"

   if request.method == "POST":
      #Get the posted form
      MyLoginForm = LoginForm(request.POST)

   if MyLoginForm.is_valid():
      username = MyLoginForm.cleaned_data['username']
   else:
      MyLoginForm = LoginForm()

   response = render_to_response(request, 'loggedin.html', {"username" : username},
      context_instance = RequestContext(request))

   response.set_cookie('last_connection', datetime.datetime.now())
   response.set_cookie('username', datetime.datetime.now())

   return response
As seen in the view above, setting cookie is done by the set_cookie method called on the response not the request, and also note that all cookies values are returned as string.
Let’s now create a formView for the login form, where we won’t display the form if cookie is set and is not older than 10 second −
def formView(request):
   if 'username' in request.COOKIES and 'last_connection' in request.COOKIES:
      username = request.COOKIES['username']

      last_connection = request.COOKIES['last_connection']
      last_connection_time = datetime.datetime.strptime(last_connection[:-7],
         "%Y-%m-%d %H:%M:%S")

      if (datetime.datetime.now() - last_connection_time).seconds < 10:
         return render(request, 'loggedin.html', {"username" : username})
      else:
         return render(request, 'login.html', {})

   else:
      return render(request, 'login.html', {})
As you can see in the formView above accessing the cookie you set, is done via the COOKIES attribute (dict) of the request.
Now let’s change the url.py file to change the URL so it pairs with our new view −
from django.conf.urls import patterns, url
from django.views.generic import TemplateView

urlpatterns = patterns('myapp.views',
   url(r'^connection/','formView', name = 'loginform'),
   url(r'^login/', 'login', name = 'login'))
When accessing /myapp/connection, you will get the following page −
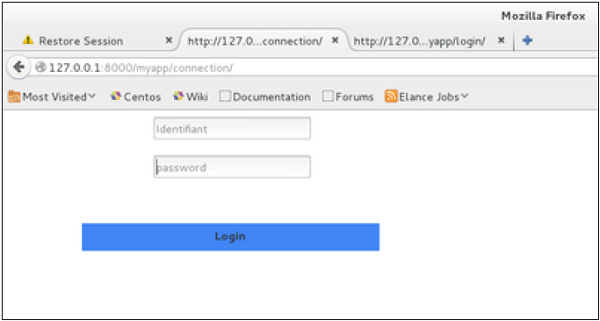
And you will get redirected to the following screen on submit −
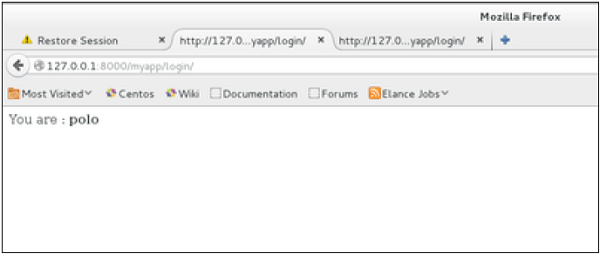
Now, if you try to access /myapp/connection again in the 10 seconds range, you will get redirected to the second screen directly. And if you access /myapp/connection again out of this range you will get the login form (screen 1).
Django Cookies
A cookie is a small piece of information stored on client-side by a web browser. Max size of a cookie is 4KB and most web browsers allow upto 20 cookies per website. Cookie information gets add to the request.
Cookie can have an expiry date and time after which it automatically gets removed. Cookie may also be set to expire with brower session.
Cookie Methods
Django provides built-in methods to set, update, fetch and delete cookies.
get() and set_cookie()
To create or update cookie add the code below in views.py
    from django.http import HttpResponse

    def setcookie(request):
        response = HttpResponse("Welcome Guest.")
        response.set_cookie('programink', 'We love Django')
        return response
To get cookie information add the code below in views.py
    def getcookie(request):
        info  = request.COOKIES.get('programink')
        return HttpResponse("Welcome Back." +  info);
Also add a matching url path under app > urls.py
    from django.urls import path
    from . import views

    urlpatterns = [
        ...
        path('setcookie',views.setcookie),
        path('getcookie',views.getcookie)
    ]
On first visit to the url response will be:
On re-visiting to the url response will be:
Cookie Expiry Timestamp
- max_age: Should be a number of seconds, or None if the cookie should last only as long as the client’s browser session.
- expires: Should either be a string in the format "Wdy, DD-Mon-YY HH:MM:SS GMT" or a datetime.datetime object in UTC.
Django Email Sending
Django can send email with its built-in library django.core.mail. You will require an SMTP account from your hosting provide or you may use Gmail. In this tutorial we are going to use a gmail account. For this you simply need to visit Gmail Account Settings and allow less seure app.

Django Mail Setup
Add the following attributes under
settings.py
    EMAIL_BACKEND = "django.core.mail.backends.smtp.EmailBackend"
    EMAIL_HOST = "smtp.gmail.com"
    EMAIL_PORT = 587
    EMAIL_HOST_USER = 'your_email@gmail.com'
    EMAIL_HOST_PASSWORD = 'your_password'
    EMAIL_USE_TLS = True
Now import the necessary packages and use the send_mail function as below:
views.py
from django.http import HttpResponse
    from django.core.mail import send_mail
    from django.conf import settings

    def my_mail(request):
        subject = "Greetings from Programink"
        msg     = "Learn Django at Programink.com"
        to      = "hello@programink.com"
        res     = send_mail(subject, msg, settings.EMAIL_HOST_USER, [to])
        if(res == 1):
            msg = "Mail Sent Successfully."
        else:
            msg = "Mail Sending Failed."
        return HttpResponse(msg)
Django - Sending E-mails
Django comes with a ready and easy-to-use light engine to send e-mail. Similar to Python you just need an import of smtplib. In Django you just need to import django.core.mail. To start sending e-mail, edit your project settings.py file and set the following options −
- EMAIL_HOST − smtp server.
- EMAIL_HOST_USER − Login credential for the smtp server.
- EMAIL_HOST_PASSWORD − Password credential for the smtp server.
- EMAIL_PORT − smtp server port.
- EMAIL_USE_TLS or _SSL − True if secure connection.
Sending a Simple E-mail
Let's create a "sendSimpleEmail" view to send a simple e-mail.
from django.core.mail import send_mail
from django.http import HttpResponse

def sendSimpleEmail(request,emailto):
   res = send_mail("hello paul", "comment tu vas?", "paul@polo.com", [emailto])
   return HttpResponse('%s'%res)
Here is the details of the parameters of send_mail −
- subject − E-mail subject.
- message − E-mail body.
- from_email − E-mail from.
- recipient_list − List of receivers’ e-mail address.
- fail_silently − Bool, if false send_mail will raise an exception in case of error.
- auth_user − User login if not set in settings.py.
- auth_password − User password if not set in settings.py.
- connection − E-mail backend.
- html_message − (new in Django 1.7) if present, the e-mail will be multipart/alternative.
Let's create a URL to access our view −
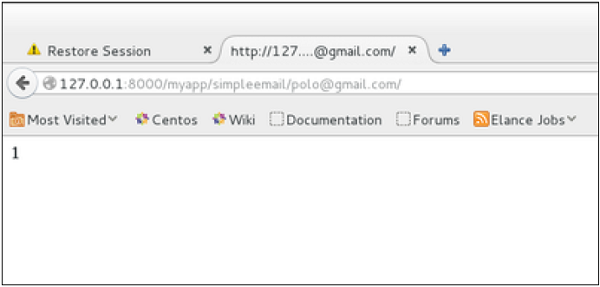
from django.conf.urls import patterns, url

urlpatterns = paterns('myapp.views', url(r'^simpleemail/(?P<emailto>
   [\w.%+-]+@[A-Za-z0-9.-]+\.[A-Za-z]{2,4})/',
   'sendSimpleEmail' , name = 'sendSimpleEmail'),)
So when accessing /myapp/simpleemail/polo@gmail.com, you will get the following page −
Sending Multiple Mails with send_mass_mail
The method returns the number of messages successfully delivered. This is same as send_mail but takes an extra parameter; datatuple, our sendMassEmail view will then be −
from django.core.mail import send_mass_mail
from django.http import HttpResponse

def sendMassEmail(request,emailto):
   msg1 = ('subject 1', 'message 1', 'polo@polo.com', [emailto1])
   msg2 = ('subject 2', 'message 2', 'polo@polo.com', [emailto2])
   res = send_mass_mail((msg1, msg2), fail_silently = False)
   return HttpResponse('%s'%res)
Let's create a URL to access our view −
from django.conf.urls import patterns, url

urlpatterns = paterns('myapp.views', url(r'^massEmail/(?P<emailto1>
   [\w.%+-]+@[A-Za-z0-9.-]+\.[A-Za-z]{2,4})/(?P<emailto2>
   [\w.%+-]+@[A-Za-z0-9.-]+\.[A-Za-z]{2,4})', 'sendMassEmail' , name = 'sendMassEmail'),)
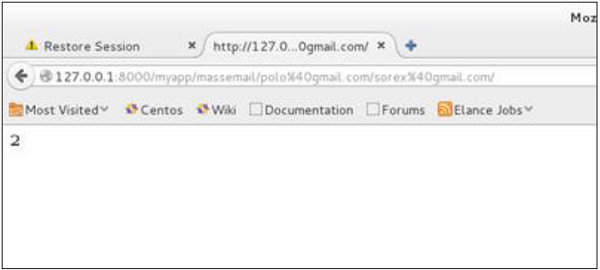
When accessing /myapp/massemail/polo@gmail.com/sorex@gmail.com/, we get −
send_mass_mail parameters details are −
- datatuples − A tuple where each element is like (subject, message, from_email, recipient_list).
- fail_silently − Bool, if false send_mail will raise an exception in case of error.
- auth_user − User login if not set in settings.py.
- auth_password − User password if not set in settings.py.
- connection − E-mail backend.
As you can see in the above image, two messages were sent successfully.
Note − In this example we are using Python smtp debuggingserver, that you can launch using −
$python -m smtpd -n -c DebuggingServer localhost:1025
This means all your sent e-mails will be printed on stdout, and the dummy server is running on localhost:1025.
Sending e-mails to admins and managers using mail_admins and mail_managers methods
These methods send e-mails to site administrators as defined in the ADMINS option of the settings.py file, and to site managers as defined in MANAGERS option of the settings.py file. Let's assume our ADMINS and MANAGERS options look like −
ADMINS = (('polo', 'polo@polo.com'),)
MANAGERS = (('popoli', 'popoli@polo.com'),)
from django.core.mail import mail_admins
from django.http import HttpResponse

def sendAdminsEmail(request):
   res = mail_admins('my subject', 'site is going down.')
   return HttpResponse('%s'%res)
The above code will send an e-mail to every admin defined in the ADMINS section.
from django.core.mail import mail_managers
from django.http import HttpResponse

def sendManagersEmail(request):
   res = mail_managers('my subject 2', 'Change date on the site.')
   return HttpResponse('%s'%res)
The above code will send an e-mail to every manager defined in the MANAGERS section.
Parameters details −
- Subject − E-mail subject.
- message − E-mail body.
- fail_silently − Bool, if false send_mail will raise an exception in case of error.
- connection − E-mail backend.
- html_message − (new in Django 1.7) if present, the e-mail will be multipart/alternative.
Sending HTML E-mail
Sending HTML message in Django >= 1.7 is as easy as −
from django.core.mail import send_mail

from django.http import HttpResponse
   res = send_mail("hello paul", "comment tu vas?", "paul@polo.com",
         ["polo@gmail.com"], html_message=")
This will produce a multipart/alternative e-mail.
But for Django < 1.7 sending HTML messages is done via the django.core.mail.EmailMessage class then calling 'send' on the object −
Let's create a "sendHTMLEmail" view to send an HTML e-mail.
from django.core.mail import EmailMessage
from django.http import HttpResponse

def sendHTMLEmail(request , emailto):
   html_content = "<strong>Comment tu vas?</strong>"
   email = EmailMessage("my subject", html_content, "paul@polo.com", [emailto])
   email.content_subtype = "html"
   res = email.send()
   return HttpResponse('%s'%res)
Parameters details for the EmailMessage class creation −
- Subject − E-mail subject.
- message − E-mail body in HTML.
- from_email − E-mail from.
- to − List of receivers’ e-mail address.
- bcc − List of “Bcc” receivers’ e-mail address.
- connection − E-mail backend.
Let's create a URL to access our view −
from django.conf.urls import patterns, url

urlpatterns = paterns('myapp.views', url(r'^htmlemail/(?P<emailto>
   [\w.%+-]+@[A-Za-z0-9.-]+\.[A-Za-z]{2,4})/',
   'sendHTMLEmail' , name = 'sendHTMLEmail'),)
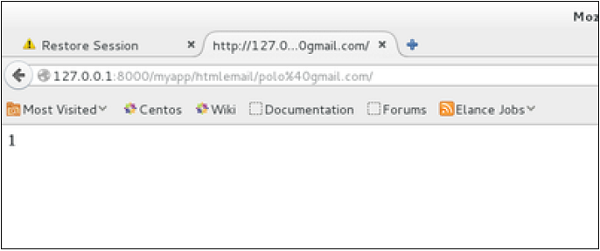
When accessing /myapp/htmlemail/polo@gmail.com, we get −
Sending E-mail with Attachment
This is done by using the 'attach' method on the EmailMessage object.
A view to send an e-mail with attachment will be −
from django.core.mail import EmailMessage
from django.http import HttpResponse

def sendEmailWithAttach(request, emailto):
   html_content = "Comment tu vas?"
   email = EmailMessage("my subject", html_content, "paul@polo.com", emailto])
   email.content_subtype = "html"

   fd = open('manage.py', 'r')
   email.attach('manage.py', fd.read(), 'text/plain')

   res = email.send()
   return HttpResponse('%s'%res)
Details on attach arguments −
- filename − The name of the file to attach.
- content − The content of the file to attach.
- mimetype − The attachment's content mime type.
Django - Caching
To cache something is to save the result of an expensive calculation, so that you don’t perform it the next time you need it. Following is a pseudo code that explains how caching works −
given a URL, try finding that page in the cache

if the page is in the cache:
   return the cached page
else:
   generate the page
   save the generated page in the cache (for next time)
   return the generated page
Django comes with its own caching system that lets you save your dynamic pages, to avoid calculating them again when needed. The good point in Django Cache framework is that you can cache −
- The output of a specific view.
- A part of a template.
- Your entire site.
To use cache in Django, first thing to do is to set up where the cache will stay. The cache framework offers different possibilities - cache can be saved in database, on file system or directly in memory. Setting is done in the settings.py file of your project.
Setting Up Cache in Database
Just add the following in the project settings.py file −
CACHES = {
   'default': {
      'BACKEND': 'django.core.cache.backends.db.DatabaseCache',
      'LOCATION': 'my_table_name',
   }
}
For this to work and to complete the setting, we need to create the cache table 'my_table_name'. For this, you need to do the following −
python manage.py createcachetable
Setting Up Cache in File System
Just add the following in the project settings.py file −
CACHES = {
   'default': {
      'BACKEND': 'django.core.cache.backends.filebased.FileBasedCache',
      'LOCATION': '/var/tmp/django_cache',
   }
}
Setting Up Cache in Memory
This is the most efficient way of caching, to use it you can use one of the following options depending on the Python binding library you choose for the memory cache −
CACHES = {
   'default': {
      'BACKEND': 'django.core.cache.backends.memcached.MemcachedCache',
      'LOCATION': '127.0.0.1:11211',
   }
}
Or
CACHES = {
   'default': {
      'BACKEND': 'django.core.cache.backends.memcached.MemcachedCache',
      'LOCATION': 'unix:/tmp/memcached.sock',
   }
}
Caching the Entire Site
The simplest way of using cache in Django is to cache the entire site. This is done by editing the MIDDLEWARE_CLASSES option in the project settings.py. The following need to be added to the option −
MIDDLEWARE_CLASSES += (
   'django.middleware.cache.UpdateCacheMiddleware',
   'django.middleware.common.CommonMiddleware',
   'django.middleware.cache.FetchFromCacheMiddleware',
)
Note that the order is important here, Update should come before Fetch middleware.
Then in the same file, you need to set −
CACHE_MIDDLEWARE_ALIAS – The cache alias to use for storage.
CACHE_MIDDLEWARE_SECONDS – The number of seconds each page should be cached.
Caching a View
If you don’t want to cache the entire site you can cache a specific view. This is done by using the cache_page decorator that comes with Django. Let us say we want to cache the result of the viewArticles view −
from django.views.decorators.cache import cache_page

@cache_page(60 * 15)

def viewArticles(request, year, month):
   text = "Displaying articles of : %s/%s"%(year, month)
   return HttpResponse(text)
As you can see cache_page takes the number of seconds you want the view result to be cached as parameter. In our example above, the result will be cached for 15 minutes.
Note − As we have seen before the above view was map to −
urlpatterns = patterns('myapp.views',
   url(r'^articles/(?P<month>\d{2})/(?P<year>\d{4})/', 'viewArticles', name = 'articles'),)
Since the URL is taking parameters, each different call will be cached separately. For example, request to /myapp/articles/02/2007 will be cached separately to /myapp/articles/03/2008.
Caching a view can also directly be done in the url.py file. Then the following has the same result as the above. Just edit your myapp/url.py file and change the related mapped URL (above) to be −
urlpatterns = patterns('myapp.views',
   url(r'^articles/(?P<month>\d{2})/(?P<year>\d{4})/',
   cache_page(60 * 15)('viewArticles'), name = 'articles'),)
And, of course, it's no longer needed in myapp/views.py.
Caching a Template Fragment
You can also cache parts of a template, this is done by using the cache tag. Let's take our hello.html template −
{% extends "main_template.html" %}
{% block title %}My Hello Page{% endblock %}
{% block content %}

Hello World!!!<p>Today is {{today}}</p>
We are
{% if today.day == 1 %}

the first day of month.
{% elif today == 30 %}

the last day of month.
{% else %}

I don't know.
{%endif%}

<p>
   {% for day in days_of_week %}
   {{day}}
</p>

{% endfor %}
{% endblock %}
And to cache the content block, our template will become −
{% load cache %}
{% extends "main_template.html" %}
{% block title %}My Hello Page{% endblock %}
{% cache 500 content %}
{% block content %}

Hello World!!!<p>Today is {{today}}</p>
We are
{% if today.day == 1 %}

the first day of month.
{% elif today == 30 %}

the last day of month.
{% else %}

I don't know.
{%endif%}

<p>
   {% for day in days_of_week %}
   {{day}}
</p>

{% endfor %}
{% endblock %}
{% endcache %}